Thursday, May 29, 2014

Monster Wishes

Mornin' hens! Can you believe it? Yup, it's one more card made with the same stamp set!  I was having so much fun I guess I just couldn't stop!  LOL!  


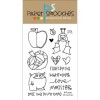
Ok, so I stamped my little monster (ain't he a doll?) onto the patterned paper and also onto some white cardstock for his horns, eyes, and tooth! Tee-hee! I fussy cut the images out and paper pieced the monster together.  Next, I added two rows of washi tape to the bottom of the card and then rounded the two bottom corners.  Using a small balloon die, I cut three balloons from the same paper collection and then cut three balloon shapes into the card front.  I added the balloon die cuts by dropping them into the cut out shapes in the card front, like a puzzle.  This makes the balloons flush with the card front which looks really neat.  I put a piece of cardstock with lots adhesive on the backside so the balloon die cuts would have something to stick to.  Using my exacto knife, I cut around the monster's hand and popped it up a little.  Then, I tied some thread around each balloon and then tucked the ends under the monster's hand.  To finish, I stamped the sentiment, added some Glossy Accents to his eyes, and drew some squiggly lines around the edges.  Now of course you noticed those FABULOUS homemade dots too, right?  Man, am I impressed with myself over those!!  I know, I know, doesn't take much to make me happy but I LUUUUUV these things!!

Here's what they look like when you put the beads in the oven...
...and here's what they look like when they come out!  Cool huh?

Okee dokee, that's it for me today!  I hope you hens have a great day! {{{hen hugs}}}

Supplies:
 

Monday, May 26, 2014

Love you to my core!

Mornin' hens!  Here's another card I made with the same stamp set that I used last week.  I just love the simplicity of this card.  The clean lines and debossed circle put the apple front and center, and the striped DP peeking out from the inside is the perfect finishing touch! 


So, I started by stamping the apple onto several different colors of patterned paper and then paper pieced the image.  The seed was my idea! Tee-hee! I just cut an elongated oval from the brown patterned paper and adhered it to the center.  Then I sponged some distress ink around the edges.  Next, using my circle Nesties, I debossed the circle onto the card front by running it through my Big Shot with the rubber mat against the front of the card instead of the cutting plate.  This prevents the die front cutting through the paper and leaves the debossed die shape instead.  I adhered the apple with some foam dimensionals and stamped the sentiment below.  Using my Copics, I colored in the hearts with R17.  To add a little interest, I cut 1/2" off the right edge but only on the front half of the card.  This leaves the inside of the card showing even when the card is closed.  To finish, I adhered some striped DP to the inside, rounded the top corner, and added some Glossy Accents to the hearts in the sentiment.  Ok, that's it for me today!  I hope you have a great day and I'll see ya back in the hen house real soon.  {{{hen hugs}}}

WE REMEMBER YOUR SACRIFICE TODAY AND EVERY DAY, ON THIS MEMORIAL DAY!  
USA flag photo: Flag - America 2 3flg012USA.gif

Supplies:
 

Thursday, May 22, 2014

Batty in Love

Mornin' hens!  
Isn't this card great?  I'm giving this to the DH for our anniversary.  LOL!  He'll love it!  My hubby isn't the mushy type, if you get my drift.  He loves my cards, but hates to read long mushy stuff.   So I figure this gets right to the point, right?  Bwah-ha-ha-ha!  Ok, so I stamped a woodgrain stamp onto some SU Chocolate Chip CS with Versamark ink, and embossed it with black embossing powder.  Man, I love how this looks.  I even stamped the branch using the same method. 


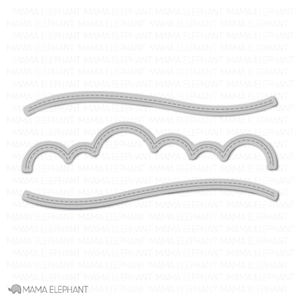
I stamped the bat onto the patterned paper twice and also onto some white cardstock for her eyes. I used the second stamped image only for her wings, so I could give them a 3D look.  After fussy cutting all the stamped pieces, I adhered them to this cloud paper starting with the branch first.  I then stamped the bat hanging from the branch and then adhered the patterned paper pieces to complete the bat.  I have to tell you, when I first chose this cloud paper I was trying to figure out how to cover those dotted lines to the right of the branch.  But once I placed my pieces on the panel, I decided to make it work for me instead of hiding it.  Hey, she's crazy, so flying in circles sounds right to me!  Bwah-ha-ha-ha!  Ok, so next I added some detailing to her fangs (how appropriate!) with my white gel pen and added some punched hearts around her head.  I cut the hill using my stitched die and adhered it to the bottom of the scene.  To finish, I added some Glossy Accents to her eyes and to the punched hearts and adhered the panel to the card base with some foam tape.  Okee dokee, that's it for me today.  I hope you all have a great day and I'll see ya back in the hen house real soon.  {{{hen hugs}}}

Supplies: