Showing posts with label Mama Elephant. Show all posts

Thursday, July 31, 2014

It's your time to shine!

Mornin' hens!  I made this card for a coworker of mine.  She needed a card for a girlfriend who was graduating and she told me they have this little saying between them, "hey girl hey!", and asked if I could incorporate it into the card somehow.  So, this is what I came up with!  Ain't it brilliant??  Bwah-ha-ha-ha!  Hope she likes it!


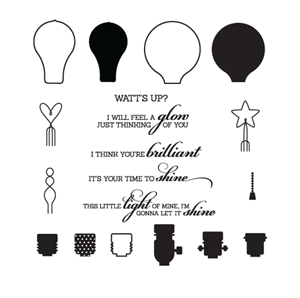
The lightbulb has an embossed base to resemble metal and I die cut a piece of transparency and adhered it on top of the light bulb so it would be shiny.  I was afraid to use Glossy Accents as I thought it might warp the paper using so much of it.  I stamped the rays and then adhered the light bulb with some foam tape.  I stamped the sentiment below and added some Wink of Stella pen to each ray for some added shimmer.


Okee dokee, that's it for me today.  I hope you hens have a great day!  {{{hen hugs}}}

Supplies:


Thursday, May 22, 2014

Batty in Love

Mornin' hens!  
Isn't this card great?  I'm giving this to the DH for our anniversary.  LOL!  He'll love it!  My hubby isn't the mushy type, if you get my drift.  He loves my cards, but hates to read long mushy stuff.   So I figure this gets right to the point, right?  Bwah-ha-ha-ha!  Ok, so I stamped a woodgrain stamp onto some SU Chocolate Chip CS with Versamark ink, and embossed it with black embossing powder.  Man, I love how this looks.  I even stamped the branch using the same method. 


I stamped the bat onto the patterned paper twice and also onto some white cardstock for her eyes. I used the second stamped image only for her wings, so I could give them a 3D look.  After fussy cutting all the stamped pieces, I adhered them to this cloud paper starting with the branch first.  I then stamped the bat hanging from the branch and then adhered the patterned paper pieces to complete the bat.  I have to tell you, when I first chose this cloud paper I was trying to figure out how to cover those dotted lines to the right of the branch.  But once I placed my pieces on the panel, I decided to make it work for me instead of hiding it.  Hey, she's crazy, so flying in circles sounds right to me!  Bwah-ha-ha-ha!  Ok, so next I added some detailing to her fangs (how appropriate!) with my white gel pen and added some punched hearts around her head.  I cut the hill using my stitched die and adhered it to the bottom of the scene.  To finish, I added some Glossy Accents to her eyes and to the punched hearts and adhered the panel to the card base with some foam tape.  Okee dokee, that's it for me today.  I hope you all have a great day and I'll see ya back in the hen house real soon.  {{{hen hugs}}}

Supplies:

Thursday, May 8, 2014

Happy Mother's Day!


Mornin' hens!  Yep, being pregnant counts!!  LOL!  
Isn't this just the cutest card??  OMG, I love it and I think Lil Chick will too for her first Mother's Day!  I cut this image from the patterned paper using my Silhouette Cameo (have I mentioned lately how much I LOVE this machine?)  {{{snort!}}}  I used the reverse side of the patterned paper underneath and adhered it with some foam tape.  I matted the piece to some white card stock that I cut with my Mama Elephant femme frame.


Next, I printed the sentiment using my computer and die cut it with a tag die.  I tied the tag on using some white organza ribbon that I tied into a cute little bow.  Then, I just adhered the panel to a white card base.  Simple AND oh so pretty!!  My kinda card!  Okee dokee, that's it for me today.  I hope you hens have a great day and I'll see ya back in the hen house real soon.  {{{hen hugs}}}

Supplies:

Thursday, May 1, 2014

Happy Anniversary!


Awwwww, aren't they sweet?  I've been itchin' to use my new branch die that I received for my birthday.  I think it works perfectly on this card, don't you?  
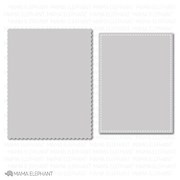
Ok, so I began by cutting a piece of white card stock using the Mama Elephant Femme Frame die.  Then I masked off just the scalloped edges and stamped the star background with Versamark ink.  I applied white embossing powder, heat embossed them, and then sponged on the blue distress ink.  Now because the blue ink won't stick to the embossed stars, I just took a tissue and wiped the stars a bit to remove any excess blue ink, and then I removed the masking tape along the scalloped edges.  Awww, pretty white stars in a night sky, with a white scalloped border!  Perfect!  
Ok, so then I cut a circle in the star panel and placed a piece of yellow card stock underneath.  After marking the yellow card stock for the area showing through the circle, I sponged some yellow distress ink around the edges to give the moon some dimension.  I adhered the star panel to navy card stock with foam tape, and then using my Perfect Layers Mini tool and Perfect Cutting Mat, I created the perfect mat behind my star panel!  I punched the owls, and die cut the branch, from black card stock and adhered them to the star panel in front of the moon.  I made the banner using the same navy card stock and heat embossed the stamped sentiment using white embossing powder.  I added a few punched red hearts and applied some glitter with my Wink of Stella glitter pen and added some Glossy Accents on top.  All that's left is to adhere the matted panel to the Kraft card base.  
Suh-weeeeeeet! 
Okee dokee, that's it for me today.  I hope you hens have a great day and I'll see ya back in the hen house real soon.  {{{hen hugs}}}

Supplies: