Friday, February 13, 2015

Cuppa Joe?

Mornin' hens!  Here's another little craft project I wanted to share with you.
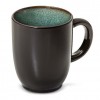
 Lil' Chick asked for her own personalized mug as her Valentine's Day gift.   Easy peasy!  I love making these.  I bought this stoneware mug at Target.  I loved how the inside is a speckled green and that tiny gold rim matches the vinyl monogram perfectly. Yay!    


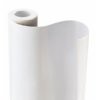
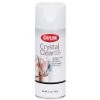
Now I know she would've been happy enough with just the coffee mug, but I wanted to give her something else too!  So I searched for coasters online and found these wooden ones.  They were $10 for a set of four with FREE shipping!  I used the same monogram (resized to fit inside the coaster), but used the negative space as a template and painted the initials with gold acrylic paint.  Here's a helpful tip: Instead of using the more expensive vinyl for the template (since you're going to peel it off and throw it away anyway), I use white Con-Tact paper instead.  I removed the Con-Tact paper template after applying 3 coats of gold paint.  Once the paint was dry, the DH then gave each coaster a coat of clear acrylic sealer.  Yoila!!  What a cute gift and for only about $17!  This would make a great gift for a teacher, or even a coworker!  Okee dokee, that's it for me today.  I hope you hens have a FABULOUS Friday and a ❤SUH-WEET❤ Saturday!  {{{hen hugs}}}    

Supplies:


Thursday, February 12, 2015

Happy 1/2 B-Day Lil' Chick!

Mornin' hens!  Here's a card I made for Lil' Chick's 1/2 birthday.  Yup, we celebrate half birthdays too!!  More presents!!  Whoopee!!  Ok, so I pulled out this ADORABLE image from Paper Smooches and colored her up to match the DP I wanted to use.  Isn't she the CUTEST?


I cut the card front 1/2" shorter then the back half of the card so when closed, the striped DP would show.  I made three ribbon banners from the same DP collection and adhered them to the card front.   Ok, so after I colored the image with my Copics, I stamped the sentiment and die cut the image using the Spellbinders scalloped rectangles.  I matted the image with some teal DP and adhered it on top of the banners with some foam tape.  I decided to add a few of my homemade enamel dots to the end of each banner and finished the card by rounding the top and bottom corners.  I think  Lil' Chick is gonna like this one a lot.  Okee dokee, that's it for me today.  I hope you hens have a TOPNOTCH Thursday!  {{{hen hugs}}}

Supplies:


Tuesday, February 10, 2015

Wanna horse around?

Mornin' hens!  Is this card a hoot or what?  This is the DH's Valentine's card.  (It better be, huh?) Bwah-ha-ha-ha!  Right up his alley, cuz as you hens know, the DH hates "mushy" cards.  Seriously, if he opens a card and there's more than 4 lines of text, he'll stop reading and his eyes go right for the signature.  No kidding....  


I began by stamping the pinstripes on the card base using Versamark ink.  This added just the right amount of subtleness to the background without becoming too busy.  Then I stamped my horse image twice onto Desert Storm (Kraft) cardstock and colored them with my Copics.   I colored just the head from the second stamped image and fussy cut it out. I adhered it to the first image using some foam tape for a fun 3D look.  Next, I rounded the corners and stitched it to a mat I cut from a piece of coordinating DP, and then rounded the corners on the mat too.  I stamped the sentiment on another piece of cardstock and drew a speech bubble using one of my Spellbinder oval dies as a template.  I cut it out and adhered it just above the horse's head with some foam tape.  I added the heart and striped DP to frame the image and finished by adding some Baker's twine and homemade enamel dots.  I just LOVE how this turned out and I think the DH will too!  Okee dokee, that's it for me today!  I hope you hens have a TEE-RIFIC Tuesday!  {{{hen hugs}}}
Supplies: