Showing posts with label The Alley Way Stamps. Show all posts

Sunday, April 19, 2015

TAWS - Guest Designer

Mornin' hens!
 Today I have two more cards to share with you as a Guest Designer for The Alley Way Stamps.   First up is my card using the "Bite Size" stamp set.


I masked off the top and bottom layers of the tiered cake and just used the middle layer as a cake stand.  Then I stamped the cupcakes on top.  The sentiment fit perfectly between the stand legs too! Yay! I drew some doodle lines around the edge and added a strip of coordinating DP to the bottom.  To finish, I rounded the corners, added a few homemade enamel dots and tied some taffeta ribbon in cute little bow.


Next up is another card I made with the "Petal Pusher" set, with a sentiment from the "More Than Words" set.  I stamped the flower image multiple times as the background and then once on a separate piece of cardstock.  I colored the extra flower with my Copics and adhered it onto the background piece with foam tape.  I stamped the sentiment onto some black cardstock with Versamark ink and heat set using white embossing powder.  To finish, I adhered the background piece to some black cardstock and added a few velvet brads for interest.


That's it for me today! Don't forget to stop by the TAWS blog for some AWESOME eye candy from the design team!  I hope you've enjoyed your visit to the hen house and hope you'll stop by again soon.  {{{hen hugs}}}

Supplies:


Sunday, April 5, 2015

The Alley Way Stamps - Guest Designer

Mornin' hens!  How exciting is this?  I'm a GUEST DESIGNER for The Alley Way Stamps for the month of April.  Woot-woot!  Alison's stamps are one of my all time favs so accepting her invitation was a no brainer!  Love, love, love her stamps!  Ok, so today I'm sharing with you two cards I made with the Petal Pusher stamp set, and a few others.  


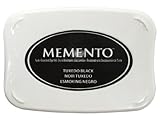
First up is this cute little card I made using the flower pot and the plant.  These two images didn't have outlines on them so I added a fine black line around the outside of each image using the Tuxedo Black marker. This marker works with Copics just like the ink pad does so no worries with any bleeding. Then I stamped all the petals on the ground but one! OMG, I was so proud of myself for coming up with the sentiment.  I actually pieced together different words from the Bee Sweet stamp set. I'm going to use this one for my DH's anniversary card.  He's gonna love it!


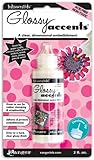
Next up is this SUPER CUTE thank you card.  I sent this one to my sister in law for my AWESOME birthday gift.  Shari's Berries!!  And before you ask, YES - I ate them ALL myself!  OMG, they were to die for.  Did I mention I have a sweet tooth?  Bwah-ha-ha-ha-ha!  Anyhoo, back to my card.   I die cut the "thanks" six times from black cardstock and glued them on top of each other.  Then, I added a coat of Glossy Accents on top!  I stamped the ribbon flowers in different colors of pigment ink and added the sentiment on top.  Easy peasy!    


Here's a close up!

Okee dokee, that's it for me today.  Be sure to check the TAWS blog for some terrific inspiration from the TAWS design team.  I hope you hens have enjoyed your stay and I hope to see ya back in the hen house real soon.   Have a SUH-WEET Sunday! {{{hen hugs}}}

Supplies: