Mornin' hens! Here's a little card and gift box I made for my niece Madilyn. I wanted to send her a little something' in the mail for her 8th birthday. She likes to make cards like her Aunt Jeanie (girl after my own heart!), so I've been telling her she needs a "handmade by" stamp so she can stamp the back of her cards and sign her name. Well, she hasn't forgotten that, so I picked her up a little stamp pad and stamp and sent them to her as a surprise. She won't be expecting a gift in the mail since her party is next weekend! Tee-hee! I love getting surprises in the mail, don't you? I think she'll love it!


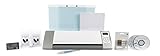
Ok, so I started by cutting the card base using my Silhouette Cameo. This was actually a 12 x 12 background mat but I resized the shape to a 3 3/4" square and then cut two of them from Kraft cardstock. Then I cut the red mat the same way but resized to a 3 1/4" square. Next, I cut a 3" square of white cardstock with my paper trimmer and stamped it it repeatedly with this sentiment from the Crazy for Chickens set. I think it made a great background paper for this card, especially with that crazy chicken flappin' her wings! LOL!

Here's a little close up of the chicken stamp. I stamped and colored two images, then layered them on top of each other with some foam dimensionals. I added some Glossy Accents to her comb and also cut some raffia into small pieces and glued them under her. Kinda looks like she's sitting on a nest!
Is it just me, or does she look like she's talking?? {{{snort}}}
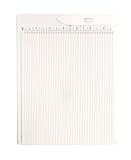
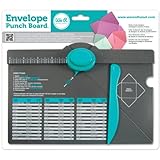
The front and back of the card are attached by a red brad. The card opens by rotating the top panel upward. Soooo cute! Oh and I almost forgot, I made the envelope too with my Envelope Punch board. Man, I'm loving making envelopes with this thing! Now since the card was a 3 3/4" square (which wasn't listed on the punch board measurement label) I decided to try my own measurements. I started with a 6 1/2" square piece of brown paper and scored it at 3 1/4". It worked perfectly! I used brown kraft paper that you wrap around packages when you mail them. It worked fine for the envelope and for the box below too.

Ok, last but not least is this SUPER CUTE homemade box. I made the band using my border punch and the same red cardstock I used for the card. Then I stamped "Happy Birthday Chick" repeatedly, like I did for the card and wrapped it around the box top. To finish, I added some twine and a small tag stamped with a cute little chick. I just love how this turned out! I'm sure kraft paper and chickens have nothing to do with it!! Bwah-ha-ha-ha-ha!! Okee dokee, that's it for me today. I hope you hens have a great day and I'll see ya back in the hen house real soon. {{{hen hugs}}}
Supplies:
.jpg)