Showing posts with label Lil' Chick. Show all posts

Tuesday, March 25, 2014

Feelin' A Little Crabby?


Mornin' hens!  Here's another little card I made for Lil' Chick!  She's had her share of morning sickness, poor thing…  I feel so bad for her.  If I could take away all her sickness for myself, I would!  I can't stand to see her feel so bad.  I guess that's just the mother in us, huh?  Sooooo, I thought I'd make her another little card to brighten her day!  She'll get a good laugh out of it for sure.  Tee-hee!  I used this stamp from Gina K Designs and watercolored it using my distress markers.  I cut the image out with my deckled rectangular Nesties and then sponged some distress ink around the edges before removing the die.  I matted all the panels using my Perfect Layers tool, and added some faux stitching using my tracing wheel.  I tied on some twine and added a little button on top to finish.  I hope you hens have a TERRIFIC Tuesday and I'll see ya back in the hen house real soon!  {{{hen hugs}}}

Supplies:  Rubber Stamp - Gina K Designs; Distress Markers & Ink Pads - Ranger "Tim Holtz"; Google Eyes; Spellbinders Nestabilities; Star Die - Simon Says Stamp; Tracing Wheel; Twine - May Arts; Gelly Roll Clear Pen; Wink of Stella Pen; Button; Star Brads - Michaels; DP - October Afternoon "Cakewalk"; Perfect Layers Tool 
REMINDER: When ordering from Perfect Paper Crafting be sure to use the discount code Jeanie5% to receive a 5% discount off your order.

Friday, March 7, 2014

I'd really love to but...


… I'm watching my aerobics class.  OMG, is this a riot or what? Smiley And it's SO ME!  Seriously, I hate exercising!  I always tell people if you see me running, look behind me because somebody is chasing me!!  Uggggh!  So of course, when I saw this stamp, I HAD to have it!  Tee-hee!  I made this card for Lil' Chick since she's havin' a little bit of morning sickness.  Poor thing…  At least it made her laugh.  Yay!  Ok, so I started off by stamping this onto some Strathmore watercolor paper and colored it with my distress markers and a water brush.  Then using my oval Nestabilities, I cut the image out and leaving the die in place, sponged some chalk ink around the edges.  I have a video on that technique HERE.  The rest of the card was a cinch as all I did was mat the DP to some rose CS using my handy dandy Perfect Layers tool and then stitched around the edges.  To finish, I added some glitter to her slippers using my Wink of Stella pen and tied on some twine before adhering the panel to the SU Kraft card base.  Okee dokee, that's it for me today.  I hope you hens have a FABULOUS Friday and a WONDERFUL weekend!  {{{hen hugs}}}

Supplies:
Stamps - American Art Stamps; CS - SU Kraft, Rose (Unknown Source); Nestabilities; Distress Markers - Ranger (Tim Holtz); Colorbox Chalk Ink; Wink of Stella - Clear; Twine; DP - October Afternoon "Cakewalk", Perfect Layers Tool

Tuesday, March 4, 2014

Lil' Chick's Expecting!!!!


OMG! OMG! OMG!  
I'm gonna be a GRANDMA!!Smiley  I'm SO excited, I can hardly contain myself!! Of course, I had to make my Lil' Chick the most AWESOME card ever, right?  Can ya tell I'm a wee bit proud?  Tee-hee!  Well, it just relates to how ecstatic I am about the BIG news!!  Ok, so I stamped the little lady onto some Neenah Classic Crest CS and colored her with my Copics.  Next, I cut the letters B and G using my Silhouette Cameo from both the DP and again from SU Early Expresso cardstock using the offset function.  I printed the sentiment onto some SU Kraft CS, folded it into a banner form and adhered it to the top of the DP using a few dimensionals for support.  To finish, I matted the DP using my Perfect Layers tool, stitched around the edges of each panel, and then tied some swiss dot ribbon around the base.

Now I hear being a Grandma is like the BEST thing ever.  So, I'd love for you to leave me a comment below and tell me what the BEST part of being Grandma is for you.  I'd LOVE to hear all about it.  Oh, and tell me what do your grandchildren call you.  I'm trying to decide if I want to be called Grandma or something else.  Ok, I hope you hens have a TERRIFIC Tuesday and I'll see ya back in the hen house real soon!  {{{hen hugs}}}

Supplies:
Stamps - Michaels Dollar Bin; CS - SU Kraft & Early Expresso; Ribbon - Offray; Silhouette Cameo; Copics; DP - My Minds Eye "Dream"; Perfect Layers Tool

Wednesday, February 12, 2014

Happy Bird-day!


Mornin' hens!  Today is Lil Chick's HALF birthday!  Oh yeah, we celebrate half birthdays too!  (Hey, any chance to get more presents, I'm in!)  snort!  So here's the little card I made for her special day.  I stamped this adorable Penny Black image onto some Strathmore watercolor paper and colored it with my distress markers and water brush.  I stamped the sentiment from Paper Smooches with Versamark ink and heat embossed with white embossing powder.  To finish, I added these little button brads and rounded the top corners.  Me loveeeeeee!  Okee dokee, that's it for me today.  I hope you hens have a WONDERFUL Wednesday and I'll see ya back in the hen house real soon!  {{{hen hugs}}}

Supplies:
Rubber Stamp - Penny Black; CS - SU Kraft; White Embossing Powder - Zing; Distress Markers - Ranger (Tim Holtz); Brads - Michaels; DP - My Minds Eye "Blink of an Eye"; Spellbinders Nestabilites; Ink Pads - Versamark & Stazon

Tuesday, February 4, 2014

Somebunny Loves You!

Mornin hens!  Isn't this card GREAT?  OMG, I'm in LOVE with it!   I made this card for Lil' Chick and Doug for Valentine's Day.  All together now, awwwww….  {snort!} 
Ok, so here's the BEST part, I watercolored it!  OMG! OMG!  I'm so proud of myself!  Smiley  I just LOVE this look!  I think I'm hooked!  Seriously, this was my first attempt and I just can't get over it.  Ummmm, can ya tell I'm a little bit excited?  Uh YEAH!  Now I have to admit, Kristina Werner made it look so simple, I had to give it a try, and boy am I glad I did!  Thanks for the inspiration Kristina!  Ok, so I started with stamping the image onto Strathmore watercolor paper, and then using my new Tim Holtz Distress Markers, I watercolored the image. Woot-woot! Then I cut the image out using my rectangle Nestabilites and leaving the die in place, I sponged some chalk ink around the edges.  Here's a video I made awhile ago on this technique.  I matted the image with PTI Pure Poppy card stock, cut using my scalloped rectangle Nestie die.  I matted all the other DP panels using my nifty Perfect Layers tool and then stitched around the edges of each panel.  I stamped the sentiment onto a scratch piece of card stock with some Versamark ink and then sprinkled some white embossing powder over it.  Then I heat set the powder and cut the piece into a banner shape and adhered it to the bottom of the card with a few dimensionals.  To finish, I added some Glossy Accents and some glitter (using my Wink of Stella glitter pen) to the hearts.  Okee dokee, that's it for me today!  I hope you hens have a TERRIFIC Tuesday and I'll see ya back in the hen house real soon!
{{{hen house}}}


Here's a close up!
Supplies:
Rubber Stamp - Penny Black, Stamping Bella (sentiment); Distress Markers - Ranger "Tim Holtz"; Watercolor Paper - Strathmore; Chalk Ink - Colorbox "Lime"; DP - October Afternoon Sidwalks, Nestabilities; Embossing Powder - Zing, CS - SU Very Vanilla, PTI Pure Poppy; Glossy Accents; Wink of Stella - Clear; Waterbrush - Faber-Castell

Reminder: When ordering from Perfect Paper Crafting, be sure to use the discount code Jeanie5% to receive a 5% discount on your order.

Thursday, February 21, 2013

Valentine's Day Card #1


 Mornin hens!  Yeah, I know I'm a little late on posting these but I thought you'd like to see them anyway.  This little one was for Lil' Chick. I thought the little girl looked like she was blowing kisses and just had to use it.  This little image is from Penny Black.  I do love her images.  They're SO CUTE!  Of course you hens know I'm a sucker for Kraft card stock so I started with SU Crumbcake and using my Silhouette Cameo, cut out the card shape, including the hearts, and the Hugs & Kisses phrase from SU Real Red CS.  I added the DP on the inside so it would peek through the open hearts, and finished with this striped grosgrain ribbon.  Mwah! to my Lil' Chick!


Supplies: Stamp - Penny Black; CS - SU Crumbcake &; Real Red; Copics; Ribbon - Stamp Simply Ribbon; DP - Echo Park "So Happy Together"; Silhouette Cameo; Silhouette Studio

Sunday, February 17, 2013

Lil' Chick's Wedding Pics

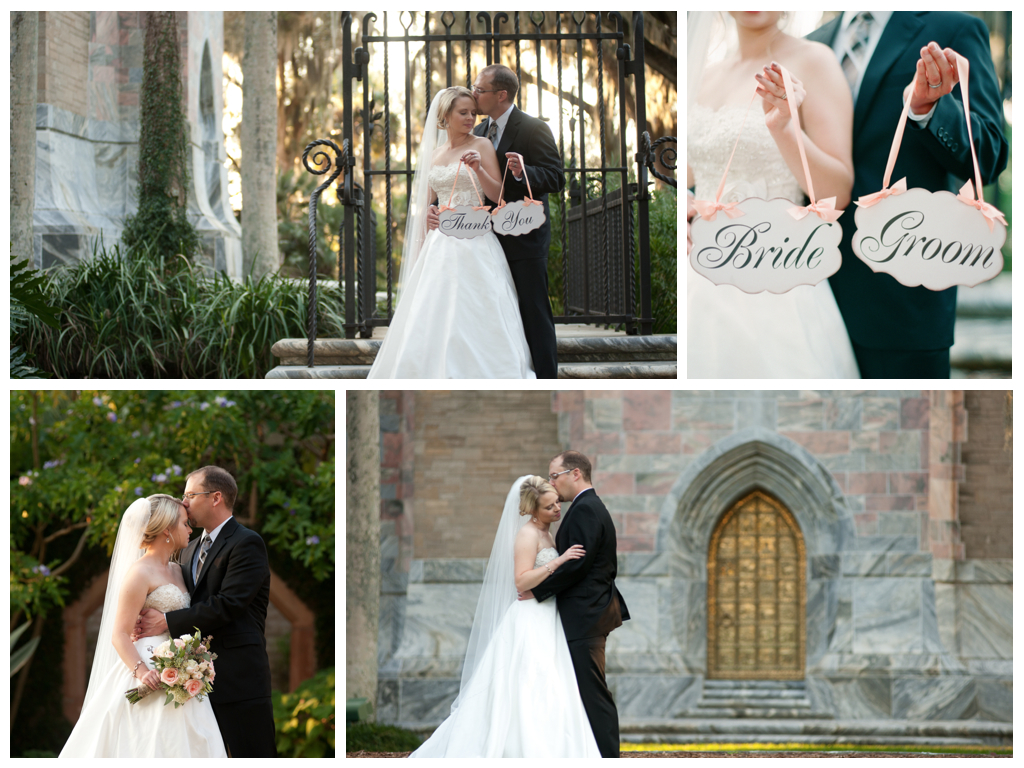
OMG!!  I'm SO STINKIN excited about these photos.  Seriously, I couldn't wait for you hens to see them.  I know I told you a little bit about the BIG day but the proof is in the pudding as they say.   These photos are the work of the ever so talented Julie Brewer, of Brewer Photography and Videography.  Here are my favorites.....  

I just loved how the photographer thought of hanging the dress.  Jessica ordered this cute hanger off of Etsy and she wore these adorable ballet flats with her dress since we didn't want to worry about heels sinking in the grass.


Of course you hens remember this hanky from the bridal shower right? She carried it in the pocket of her wedding dress.  Uh-huh, her dress had pockets!  How cool is that?  The next photo is the six pence I gave her to place in her left shoe.  "Something old, something new, something borrowed, something blue, and a six pence in her shoe!" I didn't realize there was a fifth verse to this old poem.  As I was Googling the poem, I found it, so then I had to find out what a six pence was! It's a British coin and was last produced in 1967.  I found a company that sold them and ordered one for her.  It came on the little gift card you see here and the next photo is of it placed in her left shoe.  The last photo is of me placing her veil in her hair.

These were taken just before the ceremony.  The photographer told Jessica that she was GLOWING through the viewfinder in her camera.  I totally agree!

Here are a few of my craft projects and the beginning of the ceremony.  The first photo is a sign the DH and I made together.  Jessica bought this tall black photo frame and the DH painted it with cream crackle paint.  Then he took the glass out and replaced it with a piece of backer board painted with flat black paint. He actually built this stand by cutting and re-welding an old realtor For Sale sign. I cut the vinyl lettering using my Silhouette Cameo. Oh, and I made the chair signs too!  The junior usher and flower girl are my brother's children.  SO CUTE!  Love the rose petals lining the aisle don't you?

These were taken during the ceremony.  It was such a gorgeous day and the ceremony was beautiful.  Not a dry eye in the place, not even Doug's.  (Did I mention I LOVE my new son in law?)

These were taken after the ceremony on the grounds of the gardens.  This was the most gorgeous venue ever!  The Mr & Mrs signs were made using paint stirring sticks from Home Depot and the DH painted them black for me.  I then printed the signs on card stock and glued chipboard to the backs to make them sturdy.  Then I cut the shape and attached them to the sticks.  Aren't they a lovely couple?

Jessica bought these little signs at Michaels and I sponged some distress ink around the edges and removed the boring white ribbon and used some peach ribbon instead, tying a few bows on each end.
The last photo was taken at the base of Bok Tower.  I LOVE that golden door. They play carillon bells every hour and after the wedding the bells rang from the top of the bell tower.  

Here we are, the DH and I with Doug and Jessica.  Jessica told me she didn't want me to be like every other MOB, so she had a nosegay made for me instead of a corsage.  I LOVED that!  I don't know how she did it, but for my pre-ceremony gift she gave me a small clutch to carry that matched my dress exactly! She's so thoughtful. The two MOH's are Jessica's best friends, Cheryl and Alicia and the BM is Matt, Doug's best friend. The last two photos are of my mother and father, and DH's mom (i.e. my favorite mother in law).

Now comes the reception.  The little chalkboards came from Oriental Trading and I added vinyl lettering using my Silhouette Cameo.  There were nine different cupcake flavors and they were oh so yummy. The DH angled the bottom of each sign so they would tilt back and then added little stands on the back of each one so they wouldn't fall over.  The favors were made using printed transparencies and attaching them to a 3x3 box lid made from SU Very Vanilla CS using 3 brads on each side. We filled them with cream shredded paper and Hershey's Hugs and Kisses.  Then punching two holes at the top of the transparencies, we attached the little tag with some thread and tied the peach ribbon in a bow.  The next photos are of the cake topper, the cupcake table and then the menus we made which doubled as wraps for the silverware and linen napkins.  Cute idea huh?

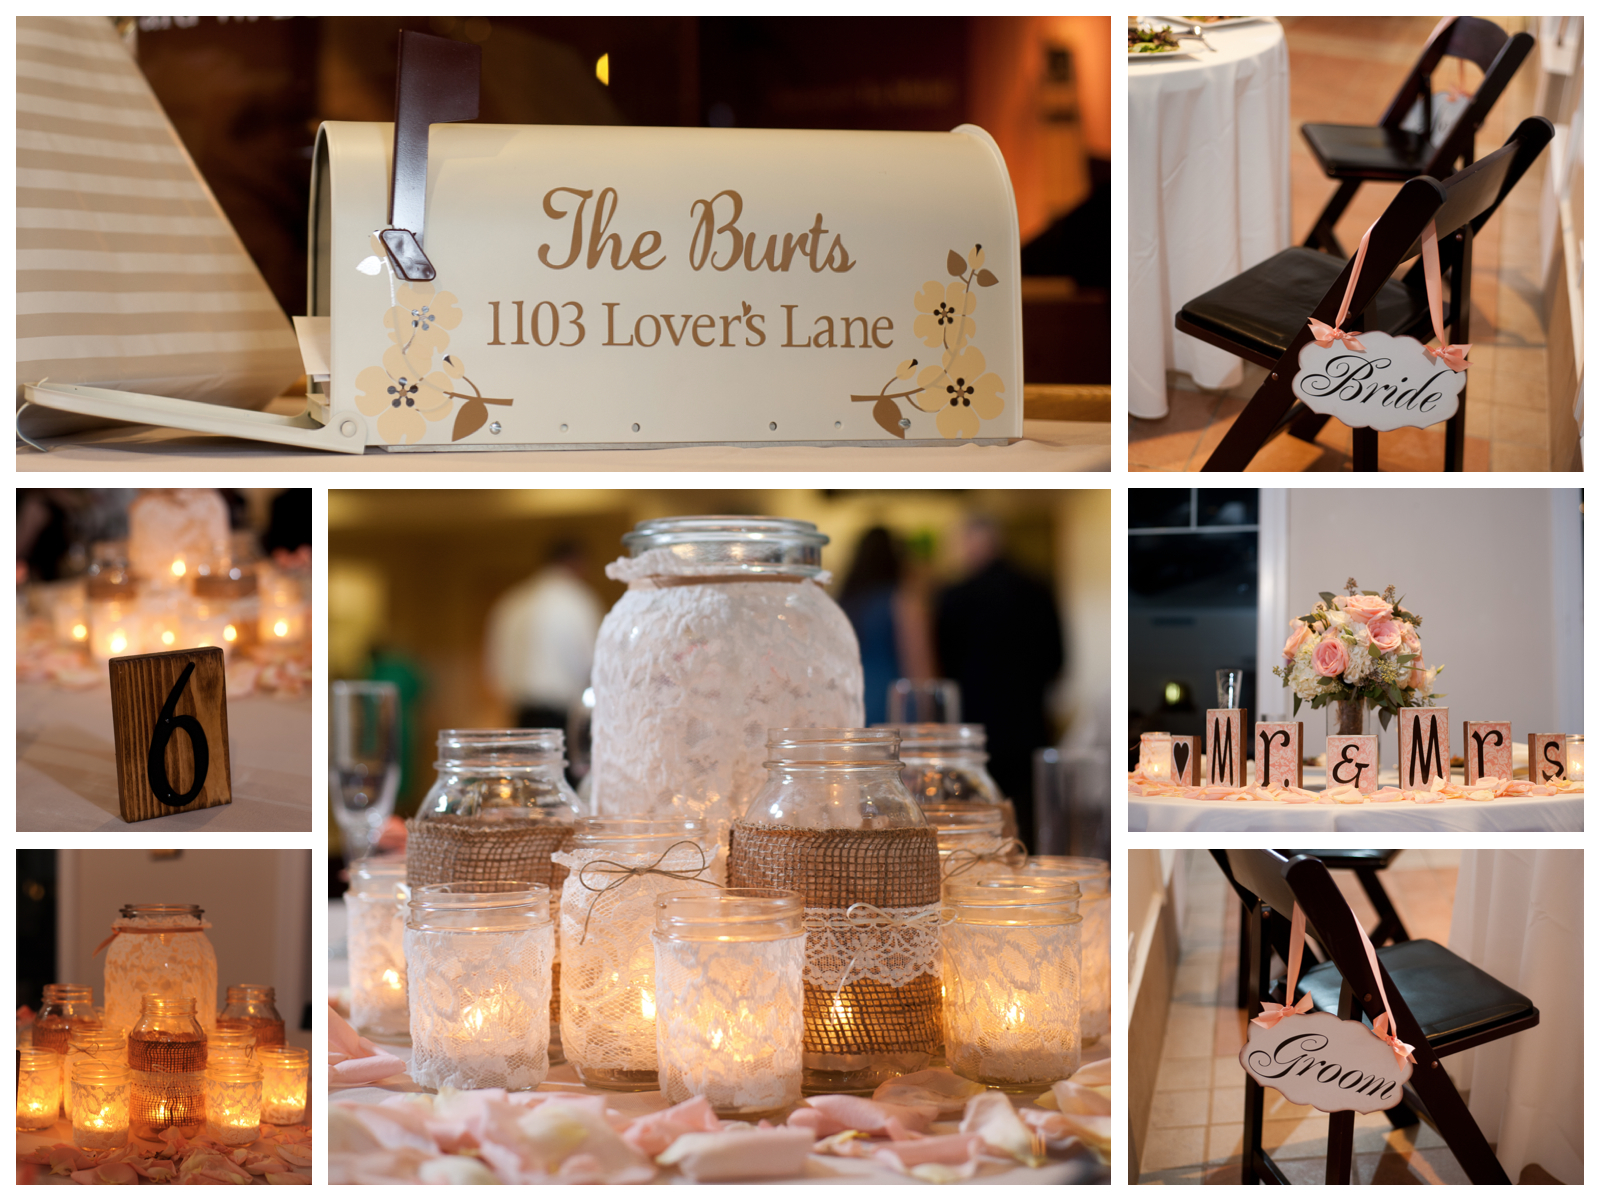
This is the mailbox the DH and I made together.  This was sitting on the gift table for the guests to place their cards in.  The DH painted it cream with a brown flag (it was black with a red flag) and I cut the vinyl flowers and letters using my Silhouette Cameo.  The table numbers were made by the DH too!  Like the cupcake signs, he cut the base of each on an angle and made little stands on the back of each one too.  Then he sanded and stained them all before attaching the numbers.  The centerpieces were made using all different sizes of mason jars (Uh-huh, 175 of them!).  We covered them with different styles of lace and burlap, and added twine and ribbon as well.  Then we hot glued long burning tealight candles inside the bottom of each one (so they would stay in the center of each jar).  The Mr & Mrs. sign on the sweetheart table was made by my good friend Jen, from The Olde Willow. She used the same DP we used for the invitations and Mod Podged it to the wood blocks! Adorable!

Another sign I made using my Silhouette Cameo.  Jessica's bouquet was used as the centerpiece on the sweetheart table. Talk about thinking of everything, we did! LOL!  The guestbook was made by Jessica and I at the LAST MINUTE (and I mean last minute!) as Hurricane Sandy prevented us from receiving the photo book that was to be used as the guestbook.  We bought this SMASH book from Michaels and we decorated the outside with lace, ribbon and a fabric rose and even added their names to the front to cover the SMASH label.  We printed her engagement photos and made a quick scrapbook for the guest to leave their warm wishes to the happy couple in.  Actually, it turned out super cute and Jessica loved it even more because we made it together!

The happy couple's first dance, and the DH and Jessica rocked the house with their SURPRISE father-daughter dance!  LOL!  It was a hoot!

More photos of their dance and a special HUG for daddy's little girl.  Yup, she has him wrapped around her little finger.  Tee-hee!

Here are a few of the DH and I dancing, Doug leading the crowd with "the Dougie" (OMG! That was SO FUNNY!) and Jessica and Doug playing the shoe game.  I had never seen this before but it was hilarious!  As you can see, they DISAGREE.  {{{snort!}}} And the last is of the two of them eating cake.  Aren't they cute?

My nephew and niece showing off their dancing skills. LOL! And finally the send off!  Everyone lit their sparklers and held them high as the happy couple ran between them to their awaiting limo.  They left for Napa Valley, California where they spent their honeymoon.  Ok that's it!  I hope you enjoyed re-living Lil' Chick's special day with me.  It was such a beautiful wedding and it warms my heart seeing the two of them so happy together. Ahhhh love, ain't it wonderful...


Wednesday, November 28, 2012

The engagement photo shoot!

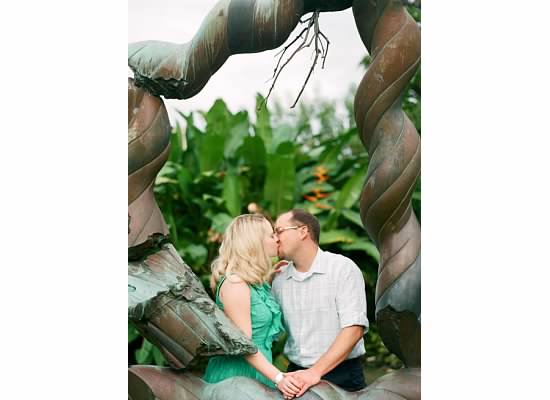
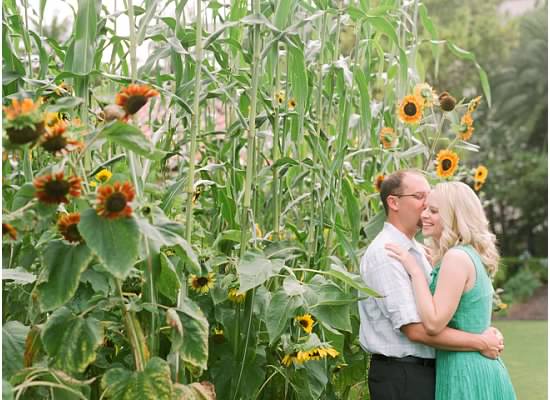
Did ya like the video?  Seriously, I could watch it over and over.  {sigh}  Jessica had her hair and makeup done professionally that morning and they drove a few hours North to the photo shoot.  Well, if you're familiar with Florida weather, you know that Summer afternoon rains are VERY common.  So sure enough, in the middle of the shoot, it started to rain, and then it poured.  But the great thing was, the videographer made the rain WORK!  Wasn't that great?  It was like the rain was meant for the video.  LOVE, LOVE, LOVE Imprint Cinemas.  Now here are some of my FAVORITE photos from their engagement photo shoot.  Enjoy!!


Saturday, November 24, 2012

Lil' Chick's Married!!


Hi hens!!  Did ya miss me??
Wowzers!  What a bizzzzzeeee 5 months we've had!!  I haven't worked this hard in I don't know how long.  But it was SO worth it, cuz' it was a GORGEOUS wedding!  Lil' Chick was the prettiest bride EVER!  Uh-huh, I cried.  But you hens knew that already, huh?  But so did my DH!!  LOL!  So much for the big ol' rough and tough guy.  Yup, when he gave his little girl away, he lost it  ..... and then so did everyone else!  Tee-hee!  It was a wonderful day, with beautiful weather too!  It couldn't have been better.   And to top it all off, I have the GREATEST new Son In Law now.  The DH and I couldn't be happier!  So, I thought I would give you hens a little recap of my time off during the next month and hopefully you might find some ideas in the midst of all the pictures and posts that might inspire you too!

So, let's start at the beginning....   It was January 2010, and Jessica had stopped in at Crispers Cafe to eat dinner. While standing in line, a voice behind her (Doug) asked, "What are you going to have?" and she replied, "A summer salad", and he said, "A summer salad in January?" They laughed, a conversation began, and they had dinner together.  That was the beginning of this beautiful love story......  The video below was taken during their engagement photo shoot.  I absolutely LOVE this video and I shed a little tear each time I watch it.  What can I say, it's the Momma in me.  Enjoy!!