Monday, June 29, 2015

American Flag Wood Blocks

Mornin' hens!
I saw this idea on Pinterest HERE, and decided to give it a try but with a slightly different look.
While the polka dots are super cute, I wanted to have the blocks look more like a real American flag.  So here's what I did....


The blocks are actually made from a 4x4 post.  The DH cut them into 7" pieces for me and then I sanded each to remove any splinters.  Next, I applied two coats of white spray paint to all three blocks and I let that dry for about 30 minutes.  To make the white stripes, I applied 1" painters tape (2 stripes to only the bottom portion of the first block, and 4 stripes to the second and third blocks).  You'll also want to cover the entire top area of the first block for this step.  Then I applied two coats of red spray paint.  I let that dry for about 30 minutes as well.


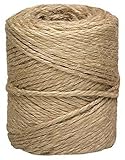
Now you can pull off all the painters tape and... here's the fun part - TADA!  Your stripes magically appear.  Tee-hee!  Ok, now for the stars.  You'll want to tape off the bottom 3 stripes on the first block to avoid overspray.  Then I cut 1" star masks from vinyl using my Silhouette Cameo and adhered 5 of them on each side.  Then I applied two coats of navy blue spray paint.  After about 30 minutes, I pulled off the star masks with tweezers and then removed the painters tape. To finish, I distressed them a bit with sandpaper and tied a bow with some jute twine.  AWESOME sauce!!  The DH was able to cut 9 blocks from the one pole he bought, so I made 3 sets of these.  July 4th is one of Lil' Chicks' favorite holidays, so I know she'll love these.  The third set was for my sister.  Okee dokee, that's it for me today.  I hope you hens have a MAHVELOUS Monday!  {{{hen hugs}}}
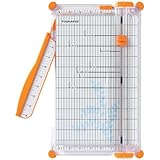
Supplies:    


Monday, June 22, 2015

What can YOU do?

Mornin' hens!
Uh huh, another baby on the way!!  Ok, now I'm beginning to worry about the water 'round here....
Bwah-ha-ha-ha! This card is for Lil' Chick's besty.  She just found out she's expecting so I couldn't wait to make her this card.  Ain't it a hoot??


I just LOVE this card.  I started by printing the digital image onto the card base using my EVER SO FABULOUS printer.  You hens know how much I LOVEE this printer, and printing digital images directly onto the card base (110lb cover stock that is...) is a piece of cake.  And of course, the awesome thing about digital images is that you can resize the image to be whatever height/width you want.  I decided 3.5" tall would be perfect for this A2 size card.  After I colored the image with my Copics, I masked the image and applied the distress inks using the dotlets stencil.  After applying the distress inks, I then added translucent embossing paste.  OMG, it looks so cool in real life with the dots raised and shiny.  Ok, so next I drew black circles around a few of the dots for a little added interest, and then rounded the two bottom corners. To finish, I added some sequins and tied a double bow with some teal baker's twine.  Oh and I almost forgot, I HAD to add a little Glossy Accents to her glasses and lips too!  Tee-hee!  Okee dokee, that's it for me today.  I hope you hens have a MAH-VELOUS Monday!  {{{hen hugs}}}

Supplies:

Friday, June 19, 2015

Happy Father's Day from Lil' Chick!

Mornin' hens!  This is the DH's Father's Day card from Lil' Chick!  Isn't it sweet? 
Lil' Chick just loves it.  Yay!  Oh and don't worry, the DH never looks at my blog (a computer wizard - he ain't! LOL!) so no worries of spoiling the surprise.   


Yup, ANOTHER digi!!  It was just soooo easy, I couldn't resist!!  The sentiment "Best Dad Ever" on the trophy is from the Father's Day sentiment set, and I just cut and pasted it onto the main image.  I resized/rotated it to fit on the trophy, then I colored the image with my Copics.  With NO bleeding!!  I'm still fascinated with that!  Who would have thought, the ink in my printer is Copic friendly??  LOVE it!  Ok, so then I just cut a few mats from DP for the background and drew some doodle lines around the edges.  I adhered the mats directly onto the card base, and adhered the image panel with foam tape on top.  I wanted to add a circle sentiment but couldn't figure out how to make one.  FINALLY, I made this one in MSWord and die cut it with a pierced circle die.  To finish, I adhered a button with twine on top and added some Wink of Stella shimmer to the trophy.  Hey, here's a tip I got from Jennifer McGuire's blog, when your Wink of Stella Clear pen runs out of liquid, don't throw it away. Unscrew the two pieces, and pop off that black plug.  Now fill it up half way with water and shake real good.  It's good to go for another good long while!!  Woot-woot!  I couldn't believe how much glitter was still in it.  And it works just like it always did.  You can't tell from the photo, but that trophy looks like gold it so glittery!!  LOL!  Okee dokee, that's it for me today!  I hope you hens have a FABULOUS Friday and I hope all the Dads out there have a FANTASTIC Father's Day too!  
{{{hen hugs}}}

Supplies: