Monday, November 25, 2013

My mind wanders...

Mornin' hens!
Just a quick post today!  This is a little card I made awhile back and forgot to post it for you.  I used some really old DP from an old Stampin Up paper pack I had.  Nothing fancy here, just a simple funny card.  You all know how much I LOVE old people images!!  Tee-hee!
Have a great Monday!  {{{hen hugs}}} 


Supplies:
Rubber Stamp - SU Golden Oldies; Perfect Layers Tool; Copics: Punch - SU Scalloped Oval; DP - Stampin Up; CS - SU River Rock


Monday, November 18, 2013

Snow Bunny


Mornin' hens!  Here's a little Christmas card I made this past weekend.  The image is "Snow Bunny" from Some Odd Girl.  As I was looking through my Christmas papers, I came across this sheet of trees and it hit me!  A background of trees with a snow hill in the foreground.  Woo-hoo!  I LOVE it when a plan comes together!  That doesn't happen too often in my OLD age!  Hmmph!  To begin with, I wanted to share a little trick I taught myself as I was making this card.  To use your Perfect Layers tool AND round your corners after, apply adhesive to the back of the DP in the center only (I just made a little X in the middle) and then adhere the DP to the card stock.  Next, using my Perfect Layers tool, I cut off the excess card stock leaving a PERFECT 1/16" border on all sides.  Then, I used the corner rounder on both the DP and the brown card stock individually.  Since there was no adhesive on the corners, I could slide both the DP and the card stock into the corner rounder with ease.  I then stitched the edges on all sides and added a snow hill with some coordinating DP.  The tree was a punch out and I added some Diamond Dust to the snow hill for an icy look. I colored the image with my Copics and adhered it with a few pop dots.  I embossed the sentiment (included with the stamp) to the bottom of the snow hill and tied on some coordinating ribbon with a button on top. I think this turned out so CUTE, don't you?  


Here's a close up look of the dimension!


Supplies:
Image - Snow Bunny from Some Odd Girl; Copics; CS - Neenah Classic Crest White, SU Early Expresso; Embossing Powder - Zing (Chestnut); Distress Ink - Tim Holtz Vintage Photo; Perfect Layers Tool; Stickles; DP - My Minds Eye (Colorful Christmas); Twinklets Diamond Dust; Corner Chomper; Ribbon - Martha Stewart; Button

Monday, November 11, 2013

Happy Birthday Randy!

Mornin' hens!  
This birthday card is for my BIL Randy. Not to worry, Randy has a GREAT sense of humor.  Wouldn't do for anyone I make a card for not to have one, right? Bwah-ha-ha-ha! 
I was pretty impressed with how my paper piecing turned out on this card.  The digital image is from Squigglefly and I've been wanting to use it for awhile now but couldn't  think of what it should say.  Any then it just hit me!  Duh!  Soooo, I printed the digital image onto some Neenah Classic Crest CS and then again onto both the striped and diamond DP.  I cut small strips of white CS and made baseboards where the two DP's met.  I added a little shading to the DP and matted it to some white CS using my Perfect Layers tool and then stitched around the edges.  I printed the sentiment and then folded it to resemble a banner and popped it up with a few dimensionals.  To finish, I added some lime green Baker's twine and a button on top.  Can't wait for him to get this one!  Love it!
Hope you hens have a great Monday! {{{hen hugs}}}


Supplies:
Digital Image - Squigglefly; CS - Stampin Up Early Expresso, Neenah Classic Crest Solar White; Copics; Perfect Layers Tool; Border Punch - Martha Stewart; DP - My Minds Eye - Dream

Thursday, October 31, 2013

Happy Halloween!

HAPPY HALLOWEEN!
I made this card for Lil' Chick and Doug!  Perfect right?  This is a Whipper Snapper Designs image I've had for quite some time.  I just LOVE all of their images.  Seriously, I could spend hours on their website. TOTALLY MY TASTE! I stamped this cute little image onto some Neenah Classic Crest CS and colored her with my Copics. I matted her with some SU Basic Black CS using my Perfect Layers tool.  Then I stitched around the edges with some black thread and tied this orange and black ribbon into a cute bow with a button on top.  Next, I stamped the sentiment onto some scratch CS and cut both ends with my pinking sheers.  To finish, I sponged some distress ink around the edges and added some little wooden stars to her stick broom!  That's it for my Halloween cards this year!  I hope you hens have a fun and safe Halloween!  {{{hen hugs}}}   


Supplies:
Stamps - Whipper Snapper Designs, Papertrey Ink; Copics; CS - Stampin Up Crumb Cake & Basic Black; DP - Harvest Plaid by Reminisce; Perfect Layers tool; Wooden Stars; Corduroy Button - SU; Ribbon - Ribbon Carrousel; Twine; Tim Holtz Distress Ink - Vintage Photo

Wednesday, October 30, 2013

Eeeeek!

Tee-hee!  She's too cute to spook, right?  My hubby said she looks like me with that crazy hair.  I wish I was that skinny!  LOL!  I stamped this image onto some Neenah Classic Crest CS and colored her with my Copics.  I matted her to some SU Basic Black CS using my Perfect Layers tool and then stitched around the edges with black thread.  I have a tutorial on stitching if you'd like to see it HERE!  Next, I added a few mini orange brads to the bottom and tied on some cute orange and black ribbon too.  The "eek" is from an OLD Making Memories rub on package and I sponged some distress ink around the edges.  I have a tutorial on sponging as well HERE.  Hope you hens have a WICKED Wednesday!  {{{hen hugs}}}


Supplies:
Stamps - Kraftin Kimmie; CS - SU Basic Black, Neenah Classic Crest White; DP - My Minds Eye Mischievous; Ribbon - Ribbon Carousel; Perfect Layers tool; Copics; Distress Ink - Tim Holtz Vintage Photo; Wooden Button; Tag Die - Simon Says Stamps; Rub On - Making Memories

Tuesday, October 29, 2013

Witch's Brew

Mornin' hens!  Isn't this card the cutest?  This is my sister's Halloween card.  She LOVES mice so I knew this was the perfect image for her.  I printed the image and then colored it with my Copics.  I matted it using my Perfect Layers tool onto some SU black cardstock.  I stitched around the edges of each panel and then tied some saddle stitch ribbon in a cute bubbly bow.  To finish, I stamped the sentiment on a punched tag and tied it to the bow with some twine.  That's it for me today!  Have a "bewitching" Tuesday!  {{{hen hugs}}}


Supplies:
Digital Image - Unknown source; Stamp - Papertrey Ink; Copics; DP - Cosmo Cricket Matilda; Perfect Layers Tools; Ribbon - Papertrey Ink; Tag Die - Simon Says Stamps; Twine; Tim Holtz Distress Ink - Vintage Photo

Monday, October 28, 2013

BOO!

Mornin' hens!  Here's a little card I made with the same Stampin Up set that I used yesterday for my Spooky Treat bags.  I'm havin' a blast with these little googly eyes!  Too cute!  The letters are regular chipboard letters and I popped them up with a few Stampin Up dimensionals.  Then I just popped the two little ghouls through the O's for a cute look!  I tied on some grosgrain ribbon and added a corduroy button on top.  Stay tuned for some more ghoulish cards coming your way!  Have a "BOOtiful" Monday!  {{{hen hugs}}}


Supplies:
Stamps - Stampin Up Googly Ghouls; Copics; Cardstock - Stampin Up Very Vanilla & Basic Black; DP - Cosmo Cricket Matilda; Perfect Layers Tool; Googly Eyes; Corduroy button - Stampin Up; Border Punch - Fiskars; Chipboard Letters

Sunday, October 27, 2013

Spooky Sweets - Open if you dare!

Hi hens!  I know, weird for me to be posting in the afternoon, huh?  I just finished up these little Halloween treat bags for my co-workers and I thought they turned out SO CUTE, I just had to show you.  I bought this kit from Stampin Up last year but never used it.  I came across the kit this year and decided to give it a go!  SUPER simple and I LOVE how they turned out.  I filled the bags with candy corn taffy!  Holy Cow is this stuff good!  Needless to say, there were several pieces that didn't make it into the bags!  LOL!  I embossed the bags and changed the Baker's Twine as the color that came in the kit wasn't very bright.  That's it for me today! Have a good evening! {{{hen hugs}}}


Supplies:
Stampin Up Goulish Googlies Designer Kit; Copics; Bakers Twine; Embossing Folders - Spider Web (Cuttlebug), Zig Zag (Goosebumps)

Sunday, October 20, 2013

Does this broom make me look fat?

Bwah-ha-ha-ha!!  What a hoot!  I just loved this image when I saw it and HAD to have it.  I found her as I was rummaging through my stamps for Halloween images.  It's amazing what I find when I start digging through my OLD stuff.  (Tee-hee!)  Ok, so I stamped her onto some Neenah Classic Crest CS and colored her with my Copics.  Then I cut her out leaving a small white border and adhered her to some SU Basic Black CS that I embossed for some added texture.  I matted the embossed piece with some white CS using my Perfect Layers tool and added the sentiment below. To finish, I tied on some sheer polka dot ribbon and added some striped paper for that extra pop of color.  Okee dokee, that's it for me today!  I'm takin' my broom out for a test drive.  Swoooooosh!  Bwah-ha-ha-ha! 
Hope you hens have a great Sunday!  {{{hen hugs}}}


Supplies:
Rubber Stamps - "Witch  Trio" Starving Artistamps; Copics; CS - SU Basic Black; Perfect Layers; Ribbon - Michaels; Mini Brads - Michaels; Embossing Folder - Stampin Up


Thursday, October 17, 2013

Booooo!

OMG!  Isn't she the CUTEST?  I just love her little snaggle tooth!  {{{snort!}}} And that spider hanging from the ribbon!  LOOOOOVE it!  Ok, so this was a pretty simple card as well.  The DP is really old so I'm not sure if it's still available.  I'm trying really hard to use up all my old stuff up before I buy anything else! Eeeeek!  The diamond is from a coordinating sheet of DP and I just cut one of the diamonds out and used it as a frame.  Although it's not very noticeable in the photo, I added the black fence border to the bottom edge.  Then to finish, I added a bubbly bow, and lots and lots of little googly eyes.  LOL! Have a great Thursday!  {{{hen hugs}}} 


Supplies:
Rubber Stamps - Googly Ghouls; Copics; CS - Stampin Up Basic Black, Very Vanilla; Perfect Layers; Ribbon - Stamp Simply Ribbon; DP - Junkitz; Googly Eyes - Michaels; Border Punch - Martha Stewart

Monday, October 14, 2013

SPOOKY CREEPY CRAWLY

Mornin' hens!  Can you believe Halloween is almost here?  Wow, this year seems to have flown by.  For those of you who don't know, Halloween is one of my most FAVORITE holidays.  I just LOVE dressing up and having fun with the little kiddos who come Trick or Treating.  They're SO STINKIN CUTE!  Anyhoo, I spent the weekend in my coop making Halloween cards! Whoopeeee!  I had a blast too!  Here is the DH's favorite.  Pretty simple too!  Doesn't that green just POP off of the kraft?
Love it!  Stay tuned for more GHOULISH GREETINGS!
Hope you hens have a great Monday! {{{hen hugs}}}   


Supplies:
Rubber Stamps - Stampin Up-Googly Ghouls, Border Banter: Papertrey Ink-Spooky Sweets; CS - Stampin Up Basic Black, Crumbcake; Copics; Googly Eyes - Michaels; Ribbon - Michaels

Wednesday, September 25, 2013

Operation Write Home Perfect Paper Crafting Blog Skip!

Mornin' hens!  Welcome to the OWH Perfect Paper Crafting Blog Skip!  OMG, this is SO MUCH fun!  And I'm so excited to be a part of such a wonderful project too! If you've just popped into my blog and would like to start at the beginning of the blog skip, you can click HERE Don't forget to leave a comment on each blog for a chance to win a $50 gift certificate at Perfect Paper Crafting. 
  

This was a super simple card to put together.  I started with a yellow cardstock base and added the DP that I matted with white cardstock using my Perfect Layers tool! This tool makes PERFECT mats each and every time!  {{Love it!}}  Then I colored the image with my Copics and cut it out with my scalloped rectangle Nestabilities.  But before removing the cut image from the die, I sponged some Momento ink in "Cantaloupe" around the edges.  I folded the ribbon and stapled it to the panel first and then adhered the image over top using a few dimensionals. There ya have it! 

Supplies: Rubber Stamp - SU Wanda's Wit and Wisdom, Perfect Layers; Copics, Ribbon - SU; Nestabilities; Momento  Cantaloupe; DP - My Minds Eye "On the Sunny Side"

Here's the inside:
LOL!  I just love it! 


...and the OWH sketch I followed:
I just flipped it right side up for a "hot dog" fold card!
  

Thanks for stopping by the hen house!  I hope you've enjoyed your visit.  Now it's time to skip on over to Kim's blog!  Wait 'til you see her coloring!  WOWZERS!  Have a great day!
{{{hen hugs}}}

Friday, September 20, 2013

Happy Birthday Doug!


The inside reads: "Tears run down my legs!" 
Bwah-ha-ha-ha!  What a hoot! I just LOVE how this card turned out! I don't know what it is about Kraft CS, but I just swoon over it every time I use it.  Ahhhhh....
I printed this digi from the "All About Dad" set from Sassy Cheryl's Stamps and colored him with my Prismacolor pencils.  Yup!  No Copics today!  I wanted the inside to remain clean with no bleed through from the Copics, so I decided to use my colored pencils instead.  And you know what?  I LOVE 'em!  I'm going to have to use these more often.  See what happens when you use those neglected items in your craft room.  It's like I just went shopping at the craft store all over again!  LOL!  I added the computer generated sentiment and tied on the ribbon to finish.  Isn't he the CUTEST?  This is for my SIL Doug's birthday!  He's probably thinking, "what kind of family did I marry into? LOL!  
I hope you hens have a GREAT day!  
{{{hen hugs}}}


Supplies: Digital Stamp - Sassy Cheryl's Stamps; Prismacolor Colored Pencils; CS -- Stampin Up Kraft; Corner Chomper - We R Memory Keepers

Monday, September 16, 2013

We're too young to be this OLD!


 LOL!  Ain't that the truth!  Funny thing about getting older, you never think of yourself as OLD!  I'm not sure why that is, but as you look at everyone else and think "they've gotten OLD", somehow you never include yourself in that equation, do you?  Too funny!  Oh well, you're only as old as you feel right?  Uh oh, that makes me about 90 then!!  Hmmph!  Here's a little card I made for my friend Karen. Thank goodness she has a great sense of humor, otherwise I might not have a Thursday lunch buddy.  LOL!  I decided recently I needed to start using stuff in my craft room that has been long neglected and as I was digging, I came across this RETIRED Stampin Up stamp set, called "Golden Oldies".  This little lady just cracks me up, with her cupcake and little party hat.  I stamped her onto some Neenah Classic Crest CS and colored her with my Copics.  Next, using my Perfect Layers tool, I matted her with some SU Really Rust CS and added a few mini brads to each corner.  I added some Crystal Effects to her glasses and tied on some grosgrain ribbon for the finishing touch!  
I hope you hens have a great day!  {{{hen hugs}}}


Supplies: Rubber Stamp - Stampin UP Golden Oldies; Copics: Perfect Layers Tool; CS -- Neenah Classic Crest, SU Really Rust; Border Punch - Stampin Up; Brads - Michaels; Corner Chomper - We R Memory Keepers; Crystal Effects

DON'T FORGET TO USE DISCOUNT CODE JEANIE5% TO RECEIVE 5% OFF YOUR ENTIRE ORDER AT WWW.PERFECTPAPERCRAFTING.COM

Monday, September 9, 2013

Bingo!

 Here's a card I made for my FMIL.  That's Favorite Mother In Law for those of you wondering. I think she'll get a kick out of it.  This is "Bingo Jean" from Art Impression's Golden Oldies line.  I absolutely LOVE this line of stamps.  I wish I owned them all.  (Pssst!  I'm trying!!)  This is my favorite kind of card to make.  I love funny birthday cards and using old people is all the better.  I stamped Jean onto some SU Very Vanilla CS and colored her with my Copics.  Using my Nestabilities dies, I cut her out and cut the inverted circle mat as well.  I adhered her to this DP from October Afternoon's Sidewalk collection and then matted that using my Perfect Layers tool to this SU Real Red CS.  I stitched around the edges and added the computer generated sentiment to the bottom.  To finish, I added some Stickles to the word BINGO, glossy accents to her glasses and a few brads at the bottom.


Here is a close up of the image and the inside as well.


Have a GREAT day!

Supplies:
Rubber Stamp - Art Impressions; Perfect Layers; CS - SU Very Vanilla, Kraft, and Real Red; DP - October Afternoon - Sidewalk; Copics; Stickles - Yellow; Glossy Accents; Nestabilities; Brads - Michaels

Tuesday, August 27, 2013

Happy Birthday LouLou!

Mornin' hens!  Today is my good friend LouLou's birthday.  LouLou lives in Switzerland and she and I me through my blog and have great friends for a few years now.  LouLou has a Westie named Ginger so when I saw this cute image "AnnaBelle Flying High" from TiddlyInks, I knew I had to have it for her.  This was a super simple card to put together too!  I printed the digital image onto some Neenah Classic Crest CS and colored it with my Copics.  Then I cut both the balloons and Ginger out and adhered the two images to this cloud DP from MyLittleShoebox.  I stamped the sentiment from Paper Smooches on the bottom left. I think it fits perfectly with this CUTE image.  Next, I stitched the DP to some SU Real Red CS and then using my Perfect Layers tool, cut the red mat to a PERFECT 1/8" all the way around.  I added some sheer polka dot ribbon and tied it in a cute bubbly bow.  To finish, I rounded the corners and adhered the panel to some SU Whisper White CS.  That's it!  Really quick and Really cute!  Have a GREAT day! 


Supplies: Digital Image - "Anna Belle Flying High" Tiddly Inks; Stamp - Paper Smoches; Copics; Perfect Layers; Ribbon - Michaels; DP - MyLittleShoebox; CS- SU Whisper White & Real Red

Monday, August 19, 2013

Here's to you!


Where's Stacey and Clinton when you need them?  LOL!
Meet "Patio Chair Rhonda" from Art Impression's Golden Oldies line.  Holy cow, is she a hoot or what?  Nothing like being a triple D and wearing spaghetti straps, right?   OMG. seriously??  Although, she does have my legs!!  Bwah-ha-ha-ha!  Ok, so I had to do Rhonda up right and add some glitter BLUE eyeshadow and some glossy red lips to complete her stylish look.  I made this card for a good friend of mine who grew up in the same small town as me.  We can totally relate to this look as it's not uncommon around here.  All that's missing is a belly button ring! Acccck! 


Here's a close up of her glitter eyeshadow and lipgloss.  Bwah-ha-ha-ha!  Now that's a girl that's got it ALL goin' on, right?  LOL!  Oh, and of course, here's the inside too.


Have a GREAT day!  Bottom's Up!  {{snort!}}

Supplies:
Rubber Stamp - Art Impressions; Copics: Perfect Layers: Glossy Accents: Gelly Roll Pen; CS - SU River Rock and Basic Black, Neenah Classic Crest White; Tim Holtz Distress Ink - Vintage Photo; DP October Afternoon Cakewalk and My Minds Eye


Monday, August 12, 2013

Happy Birthday Dinky!

Mornin' hens!  Today is Lil' Chick's birthday!  Woo-hoo!  She's been waiting for this day for whole year!  LOL!  Honestly, she's been reminding me every day beginning in July how many days until her birthday.  Like I would forget!!  Helloooooo?  She starts talking about it at least 3 months in advance so to give me plenty of time to find everything on her list!  Bwah-ha-ha-ha!  OMG, she's a riot!  Although I must say, that apple didn't fall to far from the tree (if you know what I mean!)  {{{snort!}}}

Ok, so I made her this card that I think is just perfect for her.  Lil Chick has two fur babies now, Bayley (White Lab) and Lily (Malti-Poo).  As I was going through my stamp collection, I saw this one and thought "that's it!"  The image actually had 3 dogs, but I cut one of them off and only used two of them.  Since Lily is a Malti-Poo, you know I couldn't resist using my Liquid Appliqué again.  Man, that stuff is cool.  Then I colored the rest of the image with my Copics and added some distress ink to the edges.  Next, using my FABULOUS matting tool "Perfect Layers" I matted the image with some SU Real Red CS.  See how perfectly straight AND even the red mat is around the image?  Seriously, this tool is AWESOME for matting, so you can be sure each side is perfectly straight and even.  I stitched around the edges and popped up the image panel with a few SU dimensionals.  I added some brads at the bottom and tied some satin ribbon into a bubbly bow at the top.  To finish, I stamped the sentiment onto some scrap CS and punched it out with my SU oval punches.  That's it!  
Happy Birthday Dinky!
Have a great day!


Supplies: Stamps - My Favorite Things; Perfect Layers; Copics, DP - October Afternoon Sidewalks; Liquid Appliqué; Satin Ribbon - Michaels; CS - SU Very Vanilla and Real Red; Punches - Stampin Up; Brads; Tim Holtz Distress Ink

Here's what the Perfect Layers tools look like:
Don't forget to use coupon code Jeanie5% to get a 5% discount on your order AND flat rate shipping too!

Monday, August 5, 2013

Thanks!

Mornin' hens! Here's a little thank you card that I made for Lil' Chick and Doug for that wonderful dinner they made us for our anniversary.  This is an image called "Chicken Sign" from Whipper Snapper Designs.  The word "thanks" is from Paper Smooches and it fits perfectly onto the board she's holding.  I stamped the image onto some Neenah Classic Crest CS and colored it with my Copics.  Then I cut the image out leaving about an 1/8" of white all the way around.  The card opens by lifting the chicken up and the sentiment is underneath.  The back panel is just a panel of some striped DP that I matted with so SU Basic Black CS with my Perfect Layers tool.  I love the warm colors and how the black just pops off the Kraft.  You hens all know I loveee Kraft CS so this is a win-win for me. 
Okee-dokee, that's it for me today.  I hope you hens have a GREAT Monday! 


Supplies: Rubber Stamp - "Chicken Sign" Whipper Snapper Designs; Copics; Perfect Layers; DP - My Minds Eye; Scalloped Circle Nestabilities

Monday, July 29, 2013

Happy Birthday Sis!

Mornin' hens!  Today is my sister's 57th birthday. Woot-woot!  She's taking the week off and she's out shopping all day today!  Lil' booger!  I'm SO jealous!  Anywhoo, I made her this little card using a TiddlyInks digital image that I bought awhile back.  I knew when I saw this image that I wanted to use it for my sister's birthday card. People tell us all the time that we look SO MUCH alike, so I think it fits us to a tee!  Ok, so I printed the image onto some Classic Crest CS and colored it with my Copics.  Then I stitched the image to some DP from October Afternoon's Cakewalk collection.  Next I stitched that to some SU card stock and using my Perfect Layers was able to trim the SU Riding Hood Red mat PERFECTLY on all sides.  I suppose that's why they call it the Perfect Layers tool huh?  I adhered the panel to some SU Very Vanilla CS, rounded the corners, and added a button, twine and tag to the front.  That's about it!  I hope you hens have a GREAT Monday!


Supplies: Digital Image TiddlyInks "Wryn & Emmy"; CS - SU Very Vanilla & Riding Hood Red; Perfect LayersCopics; Twine. WeRMemory Keepers Corner Chomper; Button; Tag Die - Simon Says Stamps 

Wednesday, July 24, 2013

Happy Anniversary Babe!

Mornin' hens!  Today is my 30th anniversary with my DH.  Wow!  I can't believe it's been 30 years.  I must say, he's the bestest hubby a girl could ask for.  We started dating when I was in the 10th grade. I was crazy in love with him then, and I still am today!  Happy Anniversary Babe!

So here's the little card I made for him.  On a personal note, he absolutely hates mushy, wordy cards, so you have to keep his cards short and to the point.  LOL!  I started by embossing a piece of SU Very Vanilla CS with this cute Cuttlebug embossing folder and I also used my new Tim Holtz Embossing Diffuser plates.  The diffuser plate actually prevents a section of the embossing folder from embossing the CS.  I used the circle diffuser on this card.  Then I stamped this image from My Favorite Things into the un-embossed circle area.  I colored the image with my Copics and then the FUN began!  I love, love, love using Liquid Appliqué.  I can hardly wait for the stuff to dry so I can heat set it.  I know, I'm a little kid when it comes to this stuff, but I just love to watch it puff up.  Then I stamped the sentiment onto some scrap CS and adhered it to the front with a few pop dots.  To finish, I wrapped the card with some twine, added a wooden button and tied a bow to complete this simple clean design. I LOVE it!  I hope he does too! 


Supplies: Stamps - My Favorite Things; Cardstock - SU Very Vanilla; Copics; Wooden Button; Twine; Tim Holtz Embossing Diffuser Plates; Embossing Plate - Cuttlebug; We R Memory Keepers Corner Chomper

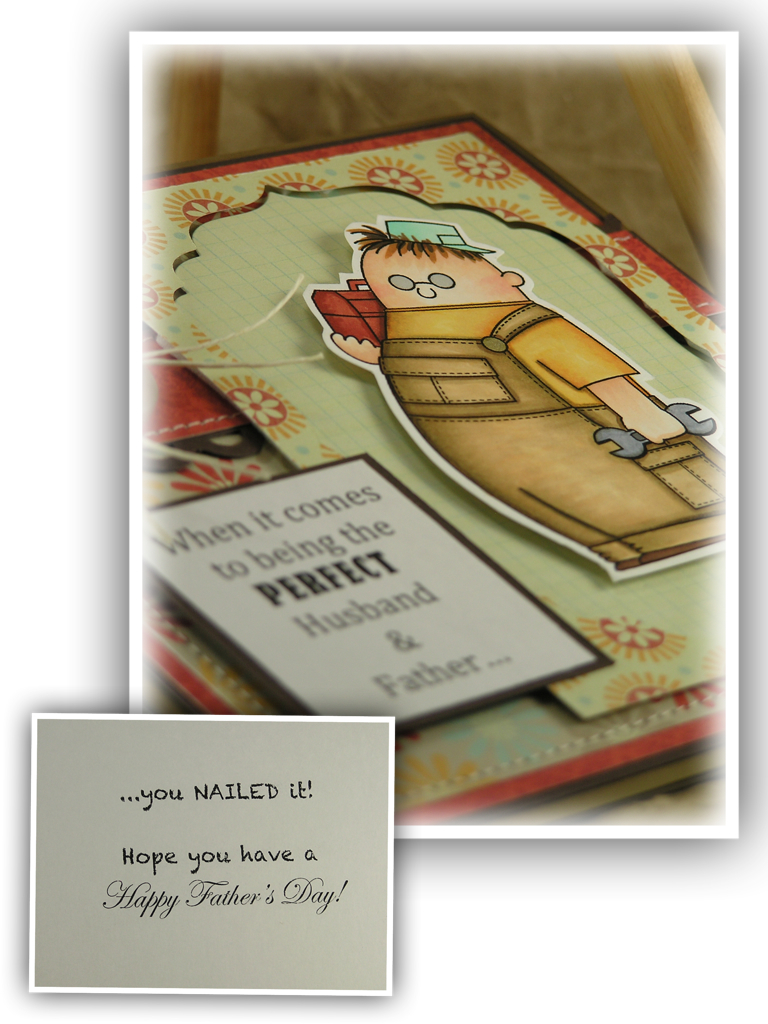
Oh, and I just had to share this card with you that Lil' Chick and Doug gave us for our anniversary. OMG!  I'm still ROFL over this one.  What a hoot (or should I say toot!).
It fits us to a tee!  Seriously, that's me!  Chubby legs, crazy hair, and of course ARTSY! And then there's the DH, well...... you get the point!  Bwah-ha-ha-ha-ha!


Now let me tell you about my weekend.  Lil' Chick and Doug asked us to come over and they wanted to make us dinner for our anniversary.  Lil' Chick was SO excited about this.  So we show up and I couldn't believe what they had done for us.  Why on earth I didn't take more pictures is beyond me... but anyway, she had her dining table all decked out with her fine china, table cloth, cloth napkins to match and this GORGEOUS bouquet in the center.  She had tea light candles burning on the side.  I'm telling you it was just stunning.  She made a Caprese salad (my FAV!) for an appetizer and then we had sparkling cider to drink, out of champagne glasses.  LOVED it!  Then for the main course Doug grilled Filet Mignon, and we had a sweet potato, tossed salad and rolls!  SHUT UP!  Seriously, it WAS the BEST meal I ever ate!  That steak just melted in your mouth, it was that good! For dessert, she had a cake made with fresh strawberries inside and buttercream frosting.  She topped that with vanilla ice cream.  OMG!  I thought I had died and went to heaven!!  Everything was just perfect!  Then if that wasn't enough, she presented us with this HUGE wrapped box. It was a Kuerig coffee maker.  Accccckkk!!  I have been wanting one of those FOREVER! Ok, I think I really am in heaven!!  God has truly blessed the DH and I with the most wonderful daughter and son in law EVER!  
Thank you both, it was just AMAZING!
Have a great day!    

Friday, July 19, 2013

Happy Birthday Andrew!

Mornin' hens!  Today is my nephew Andrew's 11th birthday.  Wow, where did the time go?  Seems like only yesterday he was just a baby.  Good grief, I'm OLD!! Ok enough of that...  Let's talk funny.  OMG!  Is this image a hoot or what?  SHUT THE FRONT DOOR!  I saw this image over at Squigglefly and went crazy over it.  You know some illustrators just have the talent of making a CUTE face and some, well.....  don't.  Well, the illustrator of these cows, NAILED IT!  Would you get a load of those eyes and nostrils.  OMG, it's the BEST!  I even love how they made the holes look 3D.  You currently get FOUR cows in this cow pack for $3!!  Uh-huh, four for $3.  Can't beat that!  Usually that's the price of one digital image.  Now hold on, let me finish before you rush off!  LOL!


I printed the image onto some Neenah Classic Crest CS and colored her with my Copics.  Then I cut her out and adhered her to this MME DP called "Garden Party" and stitched around the edges.  I matted the DP using my Perfect Layers tool and added a few baubles for some interest.  I originally had a bubbly bow tied with the saddle stitched ribbon but it was just too overpowering so I changed it to some Baker's Twine and a button.  Ahhh, much better!  I printed the sentiment from my computer and there ya have it!  Ok, now run on over to Squigglefly and get your cow patty, uh I mean cow pack!  Tee-hee!  Look out! It's a STAMPEDE!  Have a great day! 

Supplies:
Digital Image - Squigglefly; Copics; DP - My Minds Eye (Garden Party); CS - Stampin Up Early Expresso; Glossy Accents; Baubles; Button; Baker's Twine; Perfect Layers matting tool

Saturday, July 13, 2013

ConGRADulations Austin!

Mornin' hens!  Here's a little card I made for my good friend Jen's son Austin. He just graduated high school.  This image is from an older Cornish Heritage Farms set from Kim Hughes called U R A Hoot. Sadly, this company is no longer in business, but Kim does have her own company now called Paper Smooches.  I love her work.  CUTE, CUTE, CUTE!  Ok, so I started with embossing the front of my card.  However, I did not want to emboss the area where the image would go.  So I made six A2 size frames from card stock with the centers cut out.  Then I taped them together and placed them on top of the embossing folder when I ran it through my Cuttlebug.  Yoila!  The center is not embossed. Yay! Ok, then I made the brown frame using my Nestabilities and popped both it and the image up using SU dimensionals.  To finish, I tied on some Baker's Twine and then added a tiny '13 to his mortarboard.
Have a great day!


Supplies:
Stamps - "U R A Hoot" Cornish Heritage Farms, Sentiment Sampler - Paper Smooches;  Copics; Embossing Folder - Quickutz; Baker's Twine; Glossy Accents

Saturday, July 6, 2013

Introducing Perfect Tears


Mornin' hens!  So what do you think of Smoochie?  OMG, is she a riot or what?  Goodness I do LOVE this image.  Today I wanted to share a new tool called Perfect Tears.  I had never used a tool quite like this before so I thought I'd give it a whirl.  Now mind you, I  typically always have clean cut edges but I wanted to give this a go.  The 3 rulers in this set are designed for tearing paper and each ruler has two different edges.  For my project below, I used both the deckle and wave edges.  The set comes with a water pen which was the difference between night and day for me.  I tried to tear this MME DP which was quite heavy and was having no luck with a clean tear.  Then I used the water pen and the tearing was a breeze!  To my surprise, I really like this look.  And I like how the torn edges stand up a bit so it really adds texture to the layers.  


This image is from Tiddly Inks and she's called Smoochy.  I'm lovin' those lips!  You hens know I'm a sucker for any kind of farm animal.  Pigs, cows and of course CHICKENS are my favorites.  I colored Smoochy with my Copics and then matted her to some Stampin Up Basic Black CS with my Perfect Layers tool.  I printed her lips again and colored them a second time.  Then I added the second pair of lips on top for a GREAT 3D look.


Then came the hard part.  What kind of sentiment does a fat lipped cow have.  Oh my, that was crazy fun searching the internet for some ideas.  I finally stumbled onto this one and fell on the floor laughing.  What a GREAT birthday card for a girl friend, right?


And here's a close up of the results from the Perfect Tears tool.  See the little edges it leaves?  Sooooo cool?  OMG, I laugh at those lips every time I look at them. 

Here is what you get with the Perfect Tears set.  Currently, the set sells for $19.99 but you can get an extra 5% off your order if you use the code Jeanie5%

Have a great day!

Supplies:
Digital Image - Tiddly Inks; DP - My Minds Eye (Dilly Dally); Copics; CS - Neenah Classic Crest White, Stampin Up Basic Black; Ribbon - Papertrey Ink; Perfect Layers and Perfect Tears tools


Saturday, June 29, 2013

Suh-weet Lil' Madilyn!

Hi hens!  Just thought I'd pop in today and share this little card I made for my SUH-WEET niece Madilyn.  This digital image from the "Avery is Thankful" collection, is from Sassy Cheryl's Stamps.  She has some SERIOUSLY CUTE images over there.  You hens need to go take a look, but don't say I didn't warn you. LOL!  Ok, so I printed the digital image onto some Classic Crest CS and colored her with my Copics.  I stitched all the panels and made this cute rosette with my Tim Holtz die.  I bought this die probably a year ago and I've never tried it out.  I LOVE it and it was so easy to do too!  I'll definitely be using this die again soon.  Have a great day!


Supplies:
Digital Image - Sassy Cheryl's Stamps; CS - Neenah Classic Crest; Rosette - Tim Holtz Alterations; Border Punch - EK Success; Stickles; Copics; DP - Echo Park; Perfect Layers matting tool

Monday, June 24, 2013

Happy Birthday Stacey!


 Today is my sister in law's 42nd birthday.  She's a wonderful SIL and the BESTEST mother ever!  Talk about being prepared....  this gal has it ALL!  I swear she comes prepared for everything!  Need a Bandaid, she's got it!  Need a safety pin, she's got it!  Need a cold drink or snack, she's got that too! Seriously, I think she carries a 7-11 in that purse of hers!  LOL! My niece and nephew are two of the greatest kids ever... and it's because they have such a GREAT mom!  Oh yeah, and they've got my brother too!  Bwah-ha-ha-ha!  Just kidding!  My brother knows I wuv him bunches!  Anywho, Stacey is a DIEHARD coffee drinker (like me!) so when I saw this phrase on Pinterest, I knew I HAD to use it for her card.  I have to tell you this little story about Stacey.  While on a family camping trip, my mom made coffee for everyone during breakfast.  Of course we all drank a few cups and went about our day biking, hiking, etc.  Around noon, Stacey said, "I'm not feeling well, I think I'll go lie down." After a few hours she came out of the tent and said, "I have the worst headache EVER!"  So she took some Tylenol and was feeling better by the evening.  Later that evening, as we're sitting around the campfire, mom makes some more coffee for everyone but this time Stacey happens to be watching her and all of a sudden Stacey shouts, "DECAFFEINATED??  Are you kidding me?  No wonder I'm feeling so bad!"  LOL!  Of course my mom was like, what's wrong with decaffeinated?  Like you have to ask!  OMG!  So that's one of our many funny camping stories and now my mom is banned from making coffee for everyone unless she uses "LEADED" as my brother likes to call it!  


I made this card using "Morning Margaret - Have a nice day!" from Bugaboo Stamps.   OMG, isn't she a hoot!  You hens know how much I love funny people images, so Margaret is right up my alley.  Margaret, Mildred and Stella are my favs!  I printed the image onto some Classic Crest CS and colored her with my Copics.  I printed the sentiment and then stitched around the edges of each panel.  I added a little shading to the edges with some distress ink and tied a bubbly bow with this sheer dotted ribbon to finish it off.  That's it for today.  I hope you hens have a good Monday! 


Supplies:
Digital Image - Bugaboo Stamps; Copics; DP - Echo Park; Ribbon - Offray; Buttons; CS - Stampin Up Early Expresso; Glossy Accents; Twine; Distress Ink (Vintage Photo) - Tim Holtz; Perfect Layers matting tool

Friday, June 14, 2013

Happy Father's Day to my DH!


Hi there!  Just thought I'd pop in and show you this little cutie I made for my DH!  I just ADORE this image.  It's SO STINKIN cute!  I stumbled upon this illustrator while looking for a cute digital Father's Day image.  You know how that goes, masculine images are among the hardest to find, right?  Anyhoo, this image is from Birdie Brown.  You have GOT to go take a look at her images.  They are to die for!  I know I'm hooked!  She also features FREE images as well.  Woot-woot!  In fact, this little cutie was among her FREEBIES!  What?  Yup, you read right!  It's under the FREEBIES tab at the top of her blog. I'm entering this card into the Top Tip Tuesday challenge, as it just so happens that Birdie Brown is the sponsor.  I'm SO hoping to win some of her cute images.  The theme for the challenge is Masculine.  I think this little guy fits right in, don't you?  Ok, so I started by printing my image onto some Neenah Classic Crest CS and colored him with my Copics.  I cut the image out and used some SU dimensionals on the image and frame for a cool 3D look.  The frame was cut using my Nestabilities die and of course my perfectly trimmed mats were cut using the Perfect Layers rulers.  


MY TOP TIP - When cutting out an image, leave an 1/8" white border to make the image POP! I cut my images out using small crafting scissors, but remember to turn the image while cutting, not the scissors.  This helps with not bending or curling the edges of the image.

Supplies:
Digital Image - Birdie Brown; CS - Neenah Classic Crest, SU Early Expresso & Soft Suede, DP - MyMindsEye (Blink of an Eye), Twine, Button, Copics, Sakura Glaze Pens, Nestabilities, Perfect Layers 

Monday, May 27, 2013

Happy Father's Day!

Hi there!
Here is my Father's Day card for my Dad.  This fits my dad to a tee!  Ever since he retired, he's such a ham!  He reads all day or just sits on the porch and watches the birds, oh and he brags too!  Uggggh!  Needless to say, I'm jealous! I can't imagine a life without an alarm clock and sleeping in late EVERY day!  Oh yes, one day I'll be there, and I'm gonna be the ultimate RETIREE!  You just wait and see!  {snort!} Anyhoo, for today's card I used this cute little stamp from Maui Cows (sorry, they're no longer in business) and colored him with my Copics. Next, I matted the image with some green CS.  Matted you say?  Wanna know how to make the PERFECT MAT? Well, while making this card, I tested out a clever tool that I was sent to review. It's called Perfect Layers.  Have you hens heard of this?  Well, it's quite clever, I must say.  It makes the mats for your images absolutely PERFECT!  Um, I guess that's why they call it Perfect Layers, huh?  Now I have to confess, I usually just eyeball my mats, or cut them a 1/4" bigger than the image and presto I'm done.  But I will say, they're never straight or even all the way around.  I'm not sure if my cutting board is askew or what, but they never seem straight anymore.  Well, this little tool solved all that and it's super easy too.  After I colored my image, I adhered it to a piece of green CS and then using this tool and an exact knife, cut each side.  The edges are so clean and exactly the same distance all the way around.  LOVE IT!  Click HERE for a little video from the manufacturer on how they work and a 5% discount too!  Woot-woot!  I'm super impressed.  Ok, so next I cut the leaves with my Silhouette Cameo and attached them with Stampin Up dimensionals.  I threaded some Baker's twine from the hammock to the leaves so it would look the hammock was actually hanging. Seriously, this is SO my dad. LOL! Next I added two orange eyelets and threaded some ribbon through and tied it in a little bow.  To finish, I added the computer generated sentiment and that's about it!  Hope you hens are having a relaxing weekend!
Happy Memorial Day!  God Bless America!  


Supplies:
Stamp - Maui Cows; Leaves & Pointed Circle - Silhouette America; Ribbon - Michaels; Copics; Neenah Classic Crest CS; Eyelets; Baker's Twine;Perfect Layers

Sunday, May 19, 2013

Happy Birthday Lily!

Mornin' hens!  This little card is for my SUH-WEET little grand dog Lily! The DH and I just love her to bits!  When Lil' Chick comes home to visit, we ask "Are you bringing Lily?" and then let out a big sigh when the answer is "No".  The DH tells Lil Chick, "Go back home and get her!"  LOL!  The little baby is a whopping 4 years old!  Wowzers!  Where does the time go! Anyhoo, I made this little card for her big day.  This image is from Stamps by Judith.  I colored the image with my Copics and paper pieced the image onto this DP from October Afternoon.  The little gift tag did read "For My Favorite Human" but I blocked off human and wrote in Grand Dog!  Tee-hee!  I rounded the bottom of the vertical piece by sliding the paper through the punch upside down to cut only one side.  I stitched around the edges of all pieces and then tied this mint green grosgrain ribbon into a cute bubbly bow.  Have a great day!  {{{hen hugs}}}


Here's the inside!  LOL!


Supplies:
Stamps - Stamps by Judith; Copics; CS - Yellow and White; Grosgrain Ribbon - Papertrey Ink; Punches - Marvy and Stampin' Up

Sunday, May 12, 2013

Happy Mother's Day to my FMIL!

Mornin' hens! What's a FMIL you ask?  Well that's my nickname for my Favorite Mother In Law!  Tee-hee!  I call her my FMIL and she calls me her FDIL!  LOL!  I really do have the BESTEST MIL ever!  She's such a blessing to me and has the BIGGEST heart.  Love you bunches Midgee!! I hope you have a wonderful Mother's Day!  
I thought this would be a cute card for her since my DH was a bit of a booger as a kid so I thought she'd get a kick out of this image.  Looks like something my DH would do. LOL! I can just see him pulling up flowers from a flower bed to give to his mom.  (snort!) Ok, so this image is "Guilty Jack" from Ladybug Crafts Ink.  Kerry currently has this stamp on sale at 70% off!  Get 'em while they last!  I stamped Jack onto some SU Very Vanilla and then colored him with my Copics.  I cut him out with my circle Nestabilities and matted him with scalloped my Nestabilities using SU Cherry Cobbler CS.  I stitched the DP from My Minds Eye (On the Sunny Side) to some SU Very Vanilla and then tied on this crocheted ribbon.  To finish I printed this sentiment and punched it out with my tiny tag punch.  Have a great day!  {{{hen hugs}}}
  

Supplies:
Stamp - Ladybug Crafts Ink; Copics; DP - My Minds Eye (On the Sunny Side); Crocheted Ribbon - SU; Nestabilities; Tag Punch - Martha Stewart

Sunday, May 5, 2013

With Sympathy...

I must admit, these cards are definitely not the cards I like to make, but I know it will bring a little smile to the person I'm sending it to.  This was a quick card but I think it turned out cute!  I stamped this Hero Arts' image onto some SU Whisper White CS, colored it with my Copics and then cut out the image.  I punched the white lace border with my Martha Stewart border punch and adhered it across the middle of the card.  I wrapped some baker's twine around the card and then threaded it through the image and button and tied it in a bow on top.  Oh, the card base is from Amuse.  These little notecards are so nice to have on hand for whipping up a quick card.   Have a great day!  {{{hen hugs}}}


Supplies:
Stamps - Hero Arts, Paper Smooches; Copics; Baker's Twine; Card - Amuse; Button; Punch - Martha Stewart