Wednesday, July 15, 2015

Celebrate with a BANG!

Mornin' hens!
Today, my grandson Jaxon is 10 months old!  Whoa!  This year has flown by.  For those of you who don't know, I make Jaxon a birthday card each month.  Yeah, I spoil him "just a widdle bit".  LOL!  Since this card is for July, I wanted to use a "4th of July" theme and I thought this little bundle of dynamite was PERFECT!  LOL! Ain't he cute!  


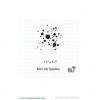
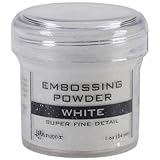
Dang, I just love these YNS images!  Those little faces are just too STINKIN CUTE!  Ok, so I stamped the dynamite image first and colored him with my Copics.  Then, to resemble the fuse "sizzling" (I guess that's what you call it?), I stamped the splatter background around the fuse using yellow ink.  I really LOVE how that turned out.  Of course, I had to whip out my washi tape stash (ya gotta love that stuff) and added the red stripe down the front.  To finish, I stamped and embossed the sentiment, added some shimmer to the sizzle with my Wink of Stella pen, and then a little Glossy Accents to his eyes. 

Here's a photo of Jaxon taken while we were visiting Lil' Chick and Doug on the 4th of July.


I know, ain't he the CUTEST!!  (Spoken like a true GRANDMA!)  Tee-hee!
 Okee dokee, that's it for me today.  I hope you hens have a WONDERFUL Wednesday!  {{{hen hugs}}}
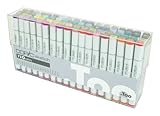
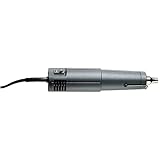
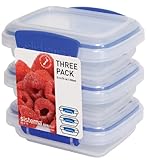
Supplies:


Monday, July 13, 2015

It's your day!!


Mornin' hens!
Is this card too cute or what?  Oh boy, I just can't get enough of this silly pig. 


I've been wanting to use this 3 square die for awhile now, so I decided to use it with an image from the YNS funny farm set.  Trouble was, which one? I love them ALL! OMG, decisions - decisions!!  Finally, I decided on the pig.  The sentiment on the inside reads, "Go HOG wild!"  LOL!  (or should I say snort!) Tee-hee!


Ok, so I popped up the top panel with foam tape and double stamped the pig's snouts and popped them up with foam tape as well.  Not sure if you can tell from the photo, but the 3D effect is really cute!  To bring a little more color to the card front, I trimmed off the right side of the front panel 3/8" and adhered a piece of the background striped DP to the inside.  This way, the inside striped DP shows even when the card is closed.  To finish, I stamped the three sentiments, added a homemade enamel dot, and a little Glossy Accents to the eyes!  Okee dokee, that's it for me today!  I hope you hens have a MAH-VELOUS Monday!  {{{hen hugs}}}

Supplies:


Friday, July 3, 2015

Reminder Box

Mornin' hens!  
So you're thinking....  what's a "reminder box"?  Well, for those of us whose brain "ain't what it used to be", we need all the reminders we can get!  Am I right?  LOL!  
Ok, so I saw this idea a while back on Jennifer McGuire's blog HERE and thought, "Hey!  I need that!".  Yeah I know, I say that on everything she does, but this was a real game changer for me.  


Instead of recipe cards (Pffft! Who needs those!) the box holds reminder cards, which are separated by month.  Each reminder card has who I need to make a card for, what occasion, the mailing address, and once I've completed the card I strike through the year.  Brilliant right??    


Ok, so the acrylic box is just plain jane when you get it (bleh), and while Jennifer didn't decorate her box she did stamp the first card in the box with balloons and let it show through the front.  Pretty cool, but since mine is sitting right on my desk, I wanted it to coordinate with my room (i.e. "the coop") so I found these cute little chicks, barn and grass from the Silhouette on line store and cut them all out of vinyl using my Silhouette Cameo.  


For the inside, I chose coordinating colors of cardstock for the month dividers.  I die cut the top edge of each divider using the file tab die.  (Note: Each tab is cut 1/2" further to the right so they're staggered.)  Then I laminated each divider and added the month using my label maker.  


Since I wanted to use the box for all my card reminders (birthdays, anniversaries, and all those holidays that I seem to forget like Nurses Day, and Administrative Professional Day, etc.), I made my own reminder cards and used DATE and then I put OCCASION underneath.  That way the reminder card can be used for any occasion.  Once I've made the card for the occasion, I line through the year on the reminder card so I know I've completed it.  This has been so helpful for me.  Especially since I like to make cards in advance and now I can just flip to the next month and know which cards I need to start working on.  Click the link below for a FREE download of this template:


Okee dokee, that's it for me today.  I hope you hens have a FABULOUS Friday and a SUPER holiday weekend!
{{{hen hugs}}}

Supplies: