Thursday, September 25, 2014

Happy Birthday to my DH!

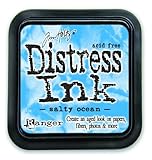
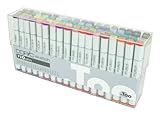
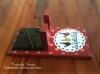
Mornin' hens! Today is my DH's birthday!!  He likes CAS cards, so this one is right up his alley!  I got this idea from one of Kristina Werner's cards last month.  I could watch her videos over and over again.  LOL!  Ok, so to start, I cut a circle from a piece of cardstock the same size as the card front and used it as a mask.  Then, using distress inks, I sponged several colors inside the circle area for muted background. Before removing the mask, I used my Prismacolor pen and drew a fine black line around the circle for a more defined look.  Then I stamped my monster and colored him with Copics.


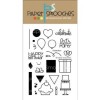
I stamped the sentiment underneath and added a few DIY enamel dots.  I could have called it a day at that point, but I wanted to add some birthday fun to the image, so I used a balloon from one of my Paper Smooches stamp set and stamped it on a scrap piece of cardstock and colored it with my Copics too!  I cut it out and adhered it to my card with some foam tape.  


Using the same Prismacolor pen I used to outline the circle, I freehand drew the balloon string to his hand.  I also added a shadow using colored pencils and Gamsol to ground the image.  To finish, I rounded the corners, added some Wink of Stella glitter and Glossy Accents to the balloon and then some white and black enamel to his eyes.  What a cutie, right?  Me luv it!!  Okee dokee, that's it for me today!  {{{hen hugs}}}

Supplies:

Monday, September 22, 2014

Sending you smiles!

Hi hens!  This splattered background idea came from Alison at The Alley Way Stamps.  Seriously, she has the most creative mind.  How she comes up with these things is beyond me.  I wish I could.  Oh well, good thing I have Alison to watch on YouTube!!  LOL!!  Anyhoo, she made her own spray mist by combining acrylic paint and rubbing alcohol in a mini spray bottle.  Hey, sounds cool to me so I wanted to give it a go.  And here's my result...  BAM!  Is this AWESOME or what?  Whoot-whoot!! (or should I say hoot-hoot!) LOL! 


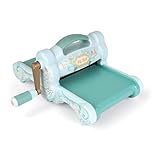
Now I wanted to add something just as fabulous on top!  This is a little "Print & Cut" image from the Silhouette on line store.  I thought she was SUPER CUTE!  Ok, so I opened the image in my Silhouette software and selected print, making sure to print the registration marks too.  Then I just put the cardstock on my cutting mat and sent it to my Silhouette Cameo selecting the cut feature this time.  Yoila!  Perfectly cut image!  I print and cut 3 of these and used the other two images to fussy cut for layering. I layered the wings, hat, and eyes for a cute 3D look!  


I stamped the sentiment and balloon onto some scratch cardstock and adhered them with some foam tape.  Now to add a little interest, I added some DIY enamel dots, rhinestones, and some glitter using my Wink of Stella pen.  To finish, I rounded the corners and added some Glossy Accents to the eyes and balloon.  Okee dokee, that's it for me today.  Hope you hens have a GREAT day!  {{{hen hugs}}}

Supplies:

Thursday, September 18, 2014

Boo!

Mornin' hens!  Ready for another gift bag idea?  Isn't this the cutest??  OMG, I saw this idea on Pinterest and HAD to make one.  I had just bought Jaxon a Halloween outfit and wanted to wrap it up, so I thought this would be PERFECT!!  And SO SIMPLE TOO!!  


Ok, so I just started with a brown medium gift bag and drew the face using a pencil.  Then I went back over it with a black Sharpie.  The white areas were done using a Faber Castell artist pen, the cheeks were colored with chalk pencils and then I used colored pencils for the nose.  To finish, I took some raffia and tied it in the middle and hot glued it to the top of the bag.  That's it!  Cute huh?  I do LOVE to wrap gifts.  It's a paper addiction, what can I say....  Tee-hee!

Supplies: