Showing posts with label Silhouette Studio. Show all posts

Monday, July 21, 2014

IOU!

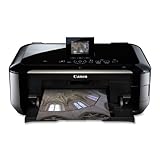
Mornin hens!!  Here's one last card I made for Lil' Chick's baby shower.  I made this card using my Silhouette Cameo.  I don't know what I would do without this machine.  It makes crafting such a breeze!  If you happen to be on the fence about buying the Silhouette Cameo, trust me - you won't be disappointed.  It's like no other cutter out there.  No cartridges to buy (or storing them) and you only purchase the images you want.  The images run about $.99 cents each, or you can get a subscription to the Silhouette on line store and get them even cheaper.  Seriously, my three favorite items in my craft room right now are my Mac, my Silhouette Cameo, and my Canon MG6220.  Honestly, it's the BEST printer I've ever had - and I've had plenty!  It will feed 110lb cardstock through with no issues at all.  It prints crisp and clean every time and I've never had a paper jam.  I've had it for 7 months now and finally replaced my first ink cartridge.  LOVE, LOVE, LOVE this printer!  But don't delay if you're interested in buying it.  This model is being discontinued and the newer models don't have the rear paper tray option.  The MG6220 can feed both from the tray underneath and from the rear tray if needed.  This is essential for printing on heavy cardstock.  It's one of four home printers recommended by cardstock companies.  If you're interested, I've put the links at the bottom of the post. 


Ok, so I began by printing the sentiment on the bottom of the card first and then I began decorating it.  I paper pieced the images cut with the Silhouette Cameo and added foam tape between a few layers for some dimension.  Nothing too fancy but I LOVE the way it turned out. 
The sweet baby boy DP is really old and I'm afraid all I had left was a half of a 12x12 sheet so I'm not sure of the company.  Using my printer, on the inside of the card I printed, "Pucker up, this is gonna take some time!"  Poor Lil' Chick, she's had such a rough time of it.  I feel so bad for her that she was so sick for the majority of her pregnancy.  And here I was only sick one day!  Bless her heart!  

Okee dokee, that's it for me today!  I hope you hens have a great day!  {{{hen hugs}}}Supplies: 

Thursday, July 17, 2014

Silhouette Wall Art

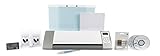
Mornin' hens!  Here's a sign the DH and I made for Jaxon's nursery.  Lil' Chick told me she saw this poem on Pinterest and wanted to know if we could make her a sign for the nursery.  She wanted the sign to be navy with white letters.   To begin, the DH spray painted the background with navy paint.  The sign looks black in the photo but it's navy, I promise! However, after I cut the letters out of white paper (to make sure my sizing was correct) I realized that it needed a little pop of color.  So we decided to cut the word "heart" out of red vinyl instead.  All the lettering was done using my Silhouette Cameo and adhesive vinyl.  The sign is 24 x 30 and is going to look stunning in his room.  Okee dokee, that's it for me today.  I hope you hens have a great day!  {{{hen hugs}}}


Supplies:

Thursday, March 21, 2013

Bon Voyage!


Mornin' hens! I don't think I mentioned to you what happened to the DH and I on the night of the wedding.  Well, if you'll stick with me, I promise, this is a GREAT story!  Ok, so as Jessica and Doug were leaving the reception, she stops and whispers in my ear, "make sure to get the envelope on Lilly's gate".  (Huh???  Whatever that meant?)  So after the guests left the reception, the DH and I were all that was left besides the wedding planner and the caterers.  We had rented an Enterprise Rent a Van for the week (total lifesaver!) to haul all the stuff to the wedding from our home and then to Jessica and Doug's new home after the wedding.  So the DH and I change clothes and for the next hour loaded all those jars, gifts, signs, cake, wedding dress, luggage from the night before, etc, etc, etc. into the van.  It took about an hour to get it loaded and then we left for their home to drop it all off. I drove Doug's car and the DH drove the van.  When we got to their home, we let Lilly out to go potty and then we started unloading everything.  We had to wrap her cake and the cupcakes up and place then in her freezer.  Then I hung her wedding dress in her closet, so it wouldn't get all wrinkled, and as we were getting Lilly's things ready (she was coming home with us while they were gone) I remembered what Jessica said about the envelope.  Sure enough, there was an envelope on Lilly's gate.  The outside was addressed to "Mommy & Daddy".  So I told the DH it must be a card for us so let's read it together.  It was a Thank You card to the parent's of the bride, and it was so beautiful! 
At the bottom she signed it, "Thank you both for making my dream come true, now it's our turn to make your dream come true.  Call me now!"  
(Say what??  Helloooo?  It's 1:30 in the morning and she's on her honeymoon!!)
But we did as directed, and the DH pulls out his cell phone and calls her.  
She and Doug answer right away and we both put our phones on speakerphone.  
She tells us to go upstairs.  So we do...
She says, "See the little table in the hall?" 
I said, "Uh-huh, the one with the Minnie and Mickey Mouse dolls on top?" 
She said, "Yes, there is an envelope under them.  Open it!" 
So we do and we pulled out this paperwork.
 She says, "Read it out loud." 
As I started reading, I finally said, "I don't understand - what is this?"
They both said, "It's a Disney cruise to Alaska! We're sending you both on your dream vacation!"  
Well, needless to say we both started crying.  
We couldn't talk for awhile and then the DH said, "You didn't need to do this!"
 They said, "You both did so much making this day special for us, we wanted to give you this!" 
I had goosebumps I was so excited, and still am!  The DH and I have wanted to take this cruise for as long as I can remember, but we figured we'd have to wait until we retire and had some extra money.  But here we are, going this year!  I can hardly believe it.  Woo-hoo! 
Ok, so this is where the card comes in. I made this Thank You card for the two of them.

This is the outside pocket which I made to look like a port hole. I cut the pocket, port hole, waves and ship with my Silhouette Cameo and stitched the edges closed. I added a piece
of transparency on the inside to resemble a window.  OMG, their faces look like ours must have when they told us! LOL!

This is the card itself.  The stamps I used are from two Stampin' Up sets that I have.  I think they work perfectly together.  I cut the sentiment with the Silhouette Cameo and stitched around the edges as well.  I added a half circle of CS at the top and attached a bow to make it easier to pull out of the pocket.  I LOVE how this turned out!  They did too!  
Now wasn't that a GREAT story?  I have the BEST Lil' Chick and new Son in Law ever!  I love 'em  both more than you know.  Have a great day!

Supplies: Stamps - Wilson's Words of Wisdom and Not So Seriously by Stampin Up; Copics; Transparency; DP - Echo Park; CS - SU Very Vanilla, Grey, Turquoise, various shades of Blue, Ribbon - Stampin Up, Silhouette Cameo; Glossy Accents; Nestabilities

Sunday, March 17, 2013

Crafting with my Cameo

Mornin hens!  Today I thought I'd share some of my craft projects I've done with my Silhouette Cameo.  Honestly, I've never bought a crafting tool as versatile as this one is.  No special tools or extra things to buy, just one machine and my computer.  Granted, you do purchase the images, but only the ones you want and for .99 cents, who can beat that?  Once you have the image, you can re-size to whatever size you need and use it over and over again (for personal use of course). And if you subscribe to the Silhouette store, you can get the images for a reduced price.  Woo-hoo! As for the lettering that you see me use a lot, I did not purchase those.  The Silhouette Cameo will cut any font you have on your computer. Great right? Of course from the multitude of wedding photos I've shown you, you know this machine got a "work out" during the wedding, but believe it or not, I haven't shown you everything yet!  LOL!  Here are a few other items I made....
  

I made insulated water glasses for each of the girls in the wedding party.  I don't know why, but I didn't take photos of them all.  Duh! This one was for the wedding planner.  Her favorite colors are pink and black.  The other girls' cups were done in whatever color vinyl that matched their dresses.  Jessica's was done in white or course, mine in brown, and so on.  The polka dots were in peach, tan and cream to match the colors of the wedding and each dress design was a little different depending on what style dress they wore. Jessica gave these to the girls on the day of the wedding.


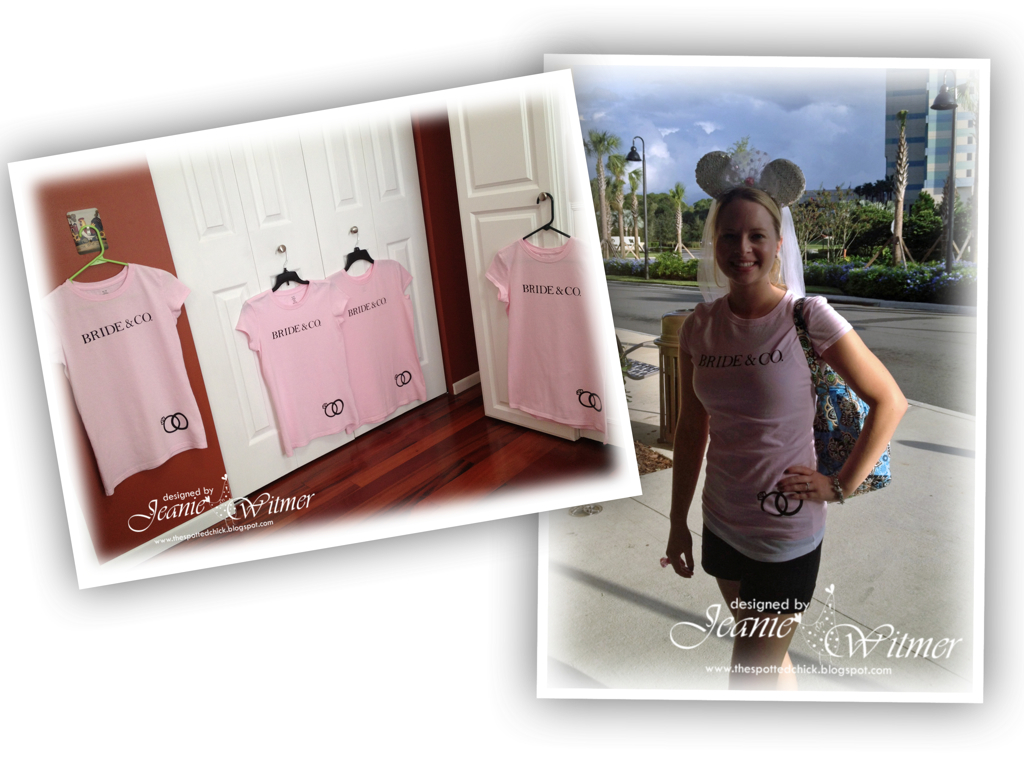
I also made shirts for the girls to wear for the bachelorette party.  Jessica and her friends went to Disney World for the weekend.  Jessica wore her Minnie Mouse bridal veil and they each wore their matching shirts that read, "Bride & Co".  I cut the letters and ring design from iron on transfer paper using my Silhouette Cameo, and then ironed it on each shirt. The girls LOVED them!


I even made my gift tags last Christmas using my Silhouette Cameo.  I cut the shape and snowflake design from Kraft CS and then sponged some distress ink around the edges of each one. I made several with a Christmas tree design too but failed to snap a picture of those. Super simple and it looked so cute with my Kraft Christmas boxes and handmade bows. 


I saw this idea on Pinterest but decided to make it even cuter by using this adorable Santa face I found in the Silhouette store.  I peeled the labels off of the Germ-X bottles and made sure all the glue was removed.  Then I cut the pieces from different colors of adhesive vinyl and adhered them onto each bottle and spelled "Santa-tizer" for the back of each.  LOL!  I finished with a little bow tied with red and green ribbon, and placed them in everyone's stocking for Christmas.  Cute huh?  These are just a few of the bazillion ideas out there that can be done with this AWESOME tool!  I can't tell you how much I LOVE this thing, but if you're on the edge about whether to buy it, DO it!  You won't be sorry.  Have a great day!


Tuesday, March 5, 2013

Happy Bird-day!

Isn't this CUTE?  So bright and cheery! Just like my Lil' Chick! I made this card for Lil' Chick's HALF birthday!  LOL!  She and I started doing this several years ago when a co-worker of mine told me her mother always celebrated her birthday and 6 months later, celebrated her 1/2 birthday!  What??  OMG! How cool is that!  Hey you know me, I'm all about any reason to make a card (not to mention gifts!).  So Lil' Chick and I started doing the same thing and have kept it going ever since.  This little image is from Paper Smooches and I colored him with my Copics.  I cut the card design and DP using my Silhouette Cameo. I decided to thread some skinny ribbon around the circle front and then tied on a cute bow through the two top holes.  I LOVE how cute this turned out, don't you? You hens have a great day!


Supplies: Stamps - Paper Smooches; Copics; DP - My Minds Eye "On the Sunny Side"; Ribbon - Michaels; Silhouette Cameo; Silhouette Studio

Friday, March 1, 2013

Valentine's Day Card #3

OMG! Is this not the CUTEST card ever?  I smile every time I look at it.  If you know my DH, you know he isn't much for mushy cards, so I usually stick with simple and funny!  Right up my alley.  See, we WERE made for each other!  Tee-hee!  This little image is from Paper Smooches.  Love that goofy grin on his face!  I cut the card design using my Silhouette Cameo and matted some DP behind the card front so it peeks through the design.  Then I cut a ring from a coordinating piece of DP and made a frame around the image.  I colored the image with my Copics and paper pieced his lab coat. His glove and test bottle are popped up with dimensionals for a 3-D look. To finish, I added some Glossy Accents to his glasses and test bottle, tied on some twine and attached the sentiment with a mini red brad.  BTW, the DH LOVED it!  He gave me a giant bag of Funyuns with my present. Oh my, does he know the way to my heart or what?  Bwah-ha-ha-ha!  I'm such a junk food junkie! LOL! Have a great day!


Supplies: Stamps - Paper Smooches; Copics; DP - Echo Park "Note to Self"; CS - White; Silhouette Cameo; Silhouette Studio; Twine; Brad; Glossy Accents


Monday, February 25, 2013

Valentine's Day Card #2

Mornin' hens!  Here is card #2 of the three that I made this year.  This card is for my NEW son in law Doug!  Again I used a Penny Black image from the same collection and colored him with my Copics.  I  cut the card shape with my Silhouette Cameo and backed the front with some SU Real Red CS.  I stamped the sentiment on some scrap white CS and adhered it under the ribbon. It's hard to tell in the photo, but I did add some red Stickles to the tops of the roses for some sparkle.  I finished it off with some Kraft colored grosgrain ribbon I picked up at My Favorite Things (awesome store by the way!) and added a red button tied on with some linen thread.   That's all for today!  Stay tuned for the final Valentine card for my DH!  


Supplies: Stamp - Penny Black; CS - SU Crumbcake and Real Red, White; Copics; Stickles; Button; Linen Thread; Ribbon - MFT; Silhouette Cameo; Silhouette Studio

Thursday, February 21, 2013

Valentine's Day Card #1


 Mornin hens!  Yeah, I know I'm a little late on posting these but I thought you'd like to see them anyway.  This little one was for Lil' Chick. I thought the little girl looked like she was blowing kisses and just had to use it.  This little image is from Penny Black.  I do love her images.  They're SO CUTE!  Of course you hens know I'm a sucker for Kraft card stock so I started with SU Crumbcake and using my Silhouette Cameo, cut out the card shape, including the hearts, and the Hugs & Kisses phrase from SU Real Red CS.  I added the DP on the inside so it would peek through the open hearts, and finished with this striped grosgrain ribbon.  Mwah! to my Lil' Chick!


Supplies: Stamp - Penny Black; CS - SU Crumbcake &; Real Red; Copics; Ribbon - Stamp Simply Ribbon; DP - Echo Park "So Happy Together"; Silhouette Cameo; Silhouette Studio
Monday, December 3, 2012

Save the Date

Ok, now be honest, do you hens know what a "Save the Date" is?  Well, for those of us a little on up in years, (uh-hum, your's truly included) we don't!  LOL!!  So, if you're one of us who don't know, it's more or less an announcement sent out approximately 6 months in advance of the wedding, letting the guests know the wedding date so they can plan ahead.   Lil' Chick found a ton of clever ideas out there regarding Save the Dates, but I wanted to do something a little different.  Here's what I came up with...


...this is the front of the card which is all done using Stampin Up supplies.  My good friend JoAnn let me borrow some of her supplies.  Jessica's colors were taupe, ivory and peach.  The wedding date was set for November 3rd so these colors would be perfect for that time of year!


This is the inside of the card.  The hearts were cut with my Silhouette Studio and glued on.  Of course the corners were rounded with my Corner Chomper (boy did that guy get a workout these past few months!) and the center piece is a MAGNET that pops out and goes on your fridge so you'll SAVE THE DATE!  

Thursday, April 12, 2012

Thank you!


Mornin' hens! Just a short and sweet post today, but none the less CUTE! {grin} I made this little Thank You card using one of the fonts on my computer, and cut it out with my..... wait for it...... yup, my Silhouette Cameo!! LOL! I can't help it, I'm havin' too much fun!

Ok, so there really wasn't much to making this other than cutting the font in both patterned paper and SU Basic Black CS and then adhering them to the DP with a few SU dimensionals. I embossed the bottom DP layer with my QuicKutz embossing folder and then tied this saddle stitched ribbon in a cute bubbly bow to finish! EASY PEASY and I LOVE it to boot! Woo-hoo! My kinda card!! That's it from the hen house today! I hope you all have a wonderful Thursday and I'll see ya back in the hen house real soon! {{{hen hugs}}}

Supplies:
Font - Brush Script MT; Silhouette Studio; CS - SU Basic Black; DP - My Minds Eye Lost & Found; Embossing Folder - QuicKutz; Saddle Stitched Ribbon - Paper Trey Ink; Corner Chomper - We R Memory Keepers

Tuesday, April 10, 2012

BLD Tuesday..

... and yet another FABULOUS card design cut with my Silhouette Cameo. I REALLY AM havin' a blast with this thing! Can ya tell? Tee-hee!

I still have a few Easter cards I made to share with you, as I just couldn't seem to stop playin' with all these CUTE BLD images. I think Lori has created a BLD MANIAC!! LOL!!

Ok, so first I cut out the Card Ornate Frame from the Silhouette Studio on line store, by ungrouping the image and cutting it in SU Soft Suede, pink and white CS. Then I layered all the pieces and printed the Lollipop Easter Basket from By Lori Designs on some Neenah Classic Crest white CS and colored it with my Copics. I sponged a little chalk ink around the edges and cut it out with my Nestabilities and then layered it on top. I finished with this pink ruffled ribbon tied in a cute bubbly bow. SUH-WEET!!

Wanna see some more eye candy? Well be sure to check out the rest of the BLD Design Team here: Lori, Hannah, Krista, Simonne, Arielle, Tina, Cindy, Kadie, Karen, Sherie, Taylor, Mary, Kim, and Tracy.
I hope you all have a wonderful Tuesday and I'll see ya back in the hen house real soon! {{{hen hugs}}}

Supplies:
Digital Image - Lollipop Easter Basket from By Lori Designs; Ornate Card Frame by Silhouette Studio On Line Store; Copics; CS - SU Soft Suede, Pink, Neenah Classic Crest White; Colorbox Chalk Ink, Nestabilities; Ribbon - Offray

Tuesday, April 3, 2012

BLD Tuesday


Mornin' hens! As you can see, I've been playin' with my Silhouette Cameo {snort} .... and I must say I LOVE this card. I used the Happy Easter Card Kit from the Silhouette Studio on line store and then backed the cut out front window with some pink card stock. (Sigh.. I'm SO lovin' this machine!)

Ok, so then it was time to gussie up the front with this fun image called "Bunny Girl Three" from the new Bug & Roo release over at By Lori Designs. I added some grass to the bottom using two different colors of green CS that I punched with my MS border punch and nestled some pastel eggs inside. I stitched around the top edge and sides, rounded the corners, and added a fun gingham bow to finish. SUPER simple card and I really LOVE the results!! Wanna see some more eye candy? Well be sure to check out the rest of the BLD Design Team here: Lori, Hannah, Krista, Simonne, Arielle, Tina, Cindy, Kadie, Karen, Sherie, Taylor, Mary, Kim, and Tracy
I hope you all have a BLESSED week and I'll see ya back in the hen house real soon! {{{hen hugs}}}

Supplies:
Digital Image - Bug & Roo Bunny Girl Three from By Lori Designs; Card Kit Happy Easter by Lori Whitlock - Silhouette Studio On Line Store; CS - Neenah Classic White, Light Green, Dark Green, Pink, Yellow, Blue, Violet; Copics; Border Punch - Martha Stewart; White Enamel Paint - Ranger; Ribbon - Michaels

Saturday, March 31, 2012

My birthday prezzie!!


Hiya hens!! I don't think I mentioned to you all what the DH and Lil' Chick got me for my birthday!! Well, they bought me a Silhouette Cameo.... Eeeeek! I was SO STINKIN' excited to get this gem, you have no idea. If you've not seen this little puppy in action, take a look over at You Tube for a few tutorials. It's absolutely amazing. I've seen the Cricket in action many times but my only reluctance to buying one, was having to buy those expensive cartridges. Ouch!! So once I saw that the Silhouette Cameo doesn't have any cartridges, and you can print any font you have on your computer, plus thousands of images in their on line store for .99 cents or less, I WAS SOLD!! I could buy just the images I wanted and not be limited to cartridges!! HOT DOG!

Now, I'm not proficient with this thing by no means, but I was pretty darn excited to make this cute little Easter bunny card as one of my first attempts with it. I took this chocolate bunny image, flipped him upright, and welded the ears together to make a card. How COOL is this??? Well, maybe not that great, but pretty good for a newbie huh? And way simple to do! I finished by cutting an "internal offset" of the image in white card stock, for the inside. And then using removable adhesive, I stuck the inside cut out on a full size 8 1/2 x 11 piece of card stock and ran it through my printer and printed an Easter greeting on it. It worked perfectly!! Oh, and what little bunny would be complete without a pom-pom for a tail?? Tee-hee! Ok, well I hope you hens have a wonderful weekend! {{{hen hugs}}}

Supplies:
Chocolate Bunny by Lori Whitlock - Silhouette Studio On Line Store; CS - SU Early Expresso, Pink, Neenah Classic Crest White; Pom Pom